
Archives
now browsing by author
Coconut Milk Yogurt
 We used eat yogurt by the bucketful. Literally. A four pound container would last about week in our house.
Zevin could eat his weight in yogurt (not literally). We used to feed him tons (again, not literally) partly because he loved it and partly because it seemed like such a wholesome food choice. The yogurt we gave him was full of healthy probiotics, after all, and Zevin’s gut needed all the help it could get.
Turned out, that Zevin is allergic to dairy. Oh, sad boy! He loved (loves) yogurt.
For a while he forgot about yogurt, but his preschool offers it as one of their family style snacks and Zevin’s started asking for it again. I stock a snack stash at school for days when he can’t eat what the school provides. I used to try to match it so if they served regular crackers, Zevin could have his allergen-free crackers; if they had regular cereal with milkm Zevin could have allergen-free cereal and non-dairy milk. But yogurt, well, I just couldn’t match that one.
We tried a few non-dairy substitutes, but none were particularly great in taste or texture, and every single non-dairy yogurt contained gums of some sort and most have added sugar. I might’ve occasionally bent my rules about whole ingredients and no added sugar so that Zevin could enjoy a yogurt at school on days that they served yogurt, but guar and xanthan can both be derived from corn. And yep, he’s allergic to corn.
Arrgh, what to do? My son is such a good sport about his food allergies, but this yogurt thing was getting him down.
I thought about coconut milk yogurt but we eat so much coconut already – coconut flour, dried coconut and coconut milk – that I wanted to go a different route. And I wanted protein in the yogurt. Nut milks are often used for dairy-free yogurt, but Zevin’s preschool is nut-free so nuts were out. Then I wondered about seeds. I have substituted sunflower seed butter (sunbutter) for nut butter in recipes before. Perhaps seeds would work.
After hours (days!) of research I discovered that most seeds lack the fat content necessary for making yogurt. I did find a single recipe for making sunflower yogurt out of homemade sunflower seed milk, but after three unsuccessful attempts resulting in watery (though tasty) yogurt, I abandoned the recipe.
So back to coconut milk yogurt. It doesn’t rate high for protein, but it does have healthy fats and, as a fermented food, it offers wonderful probiotics. Best of all, Zevin can sit elbow to elbow with his friends at the snack table enjoying (almost) the same thing.
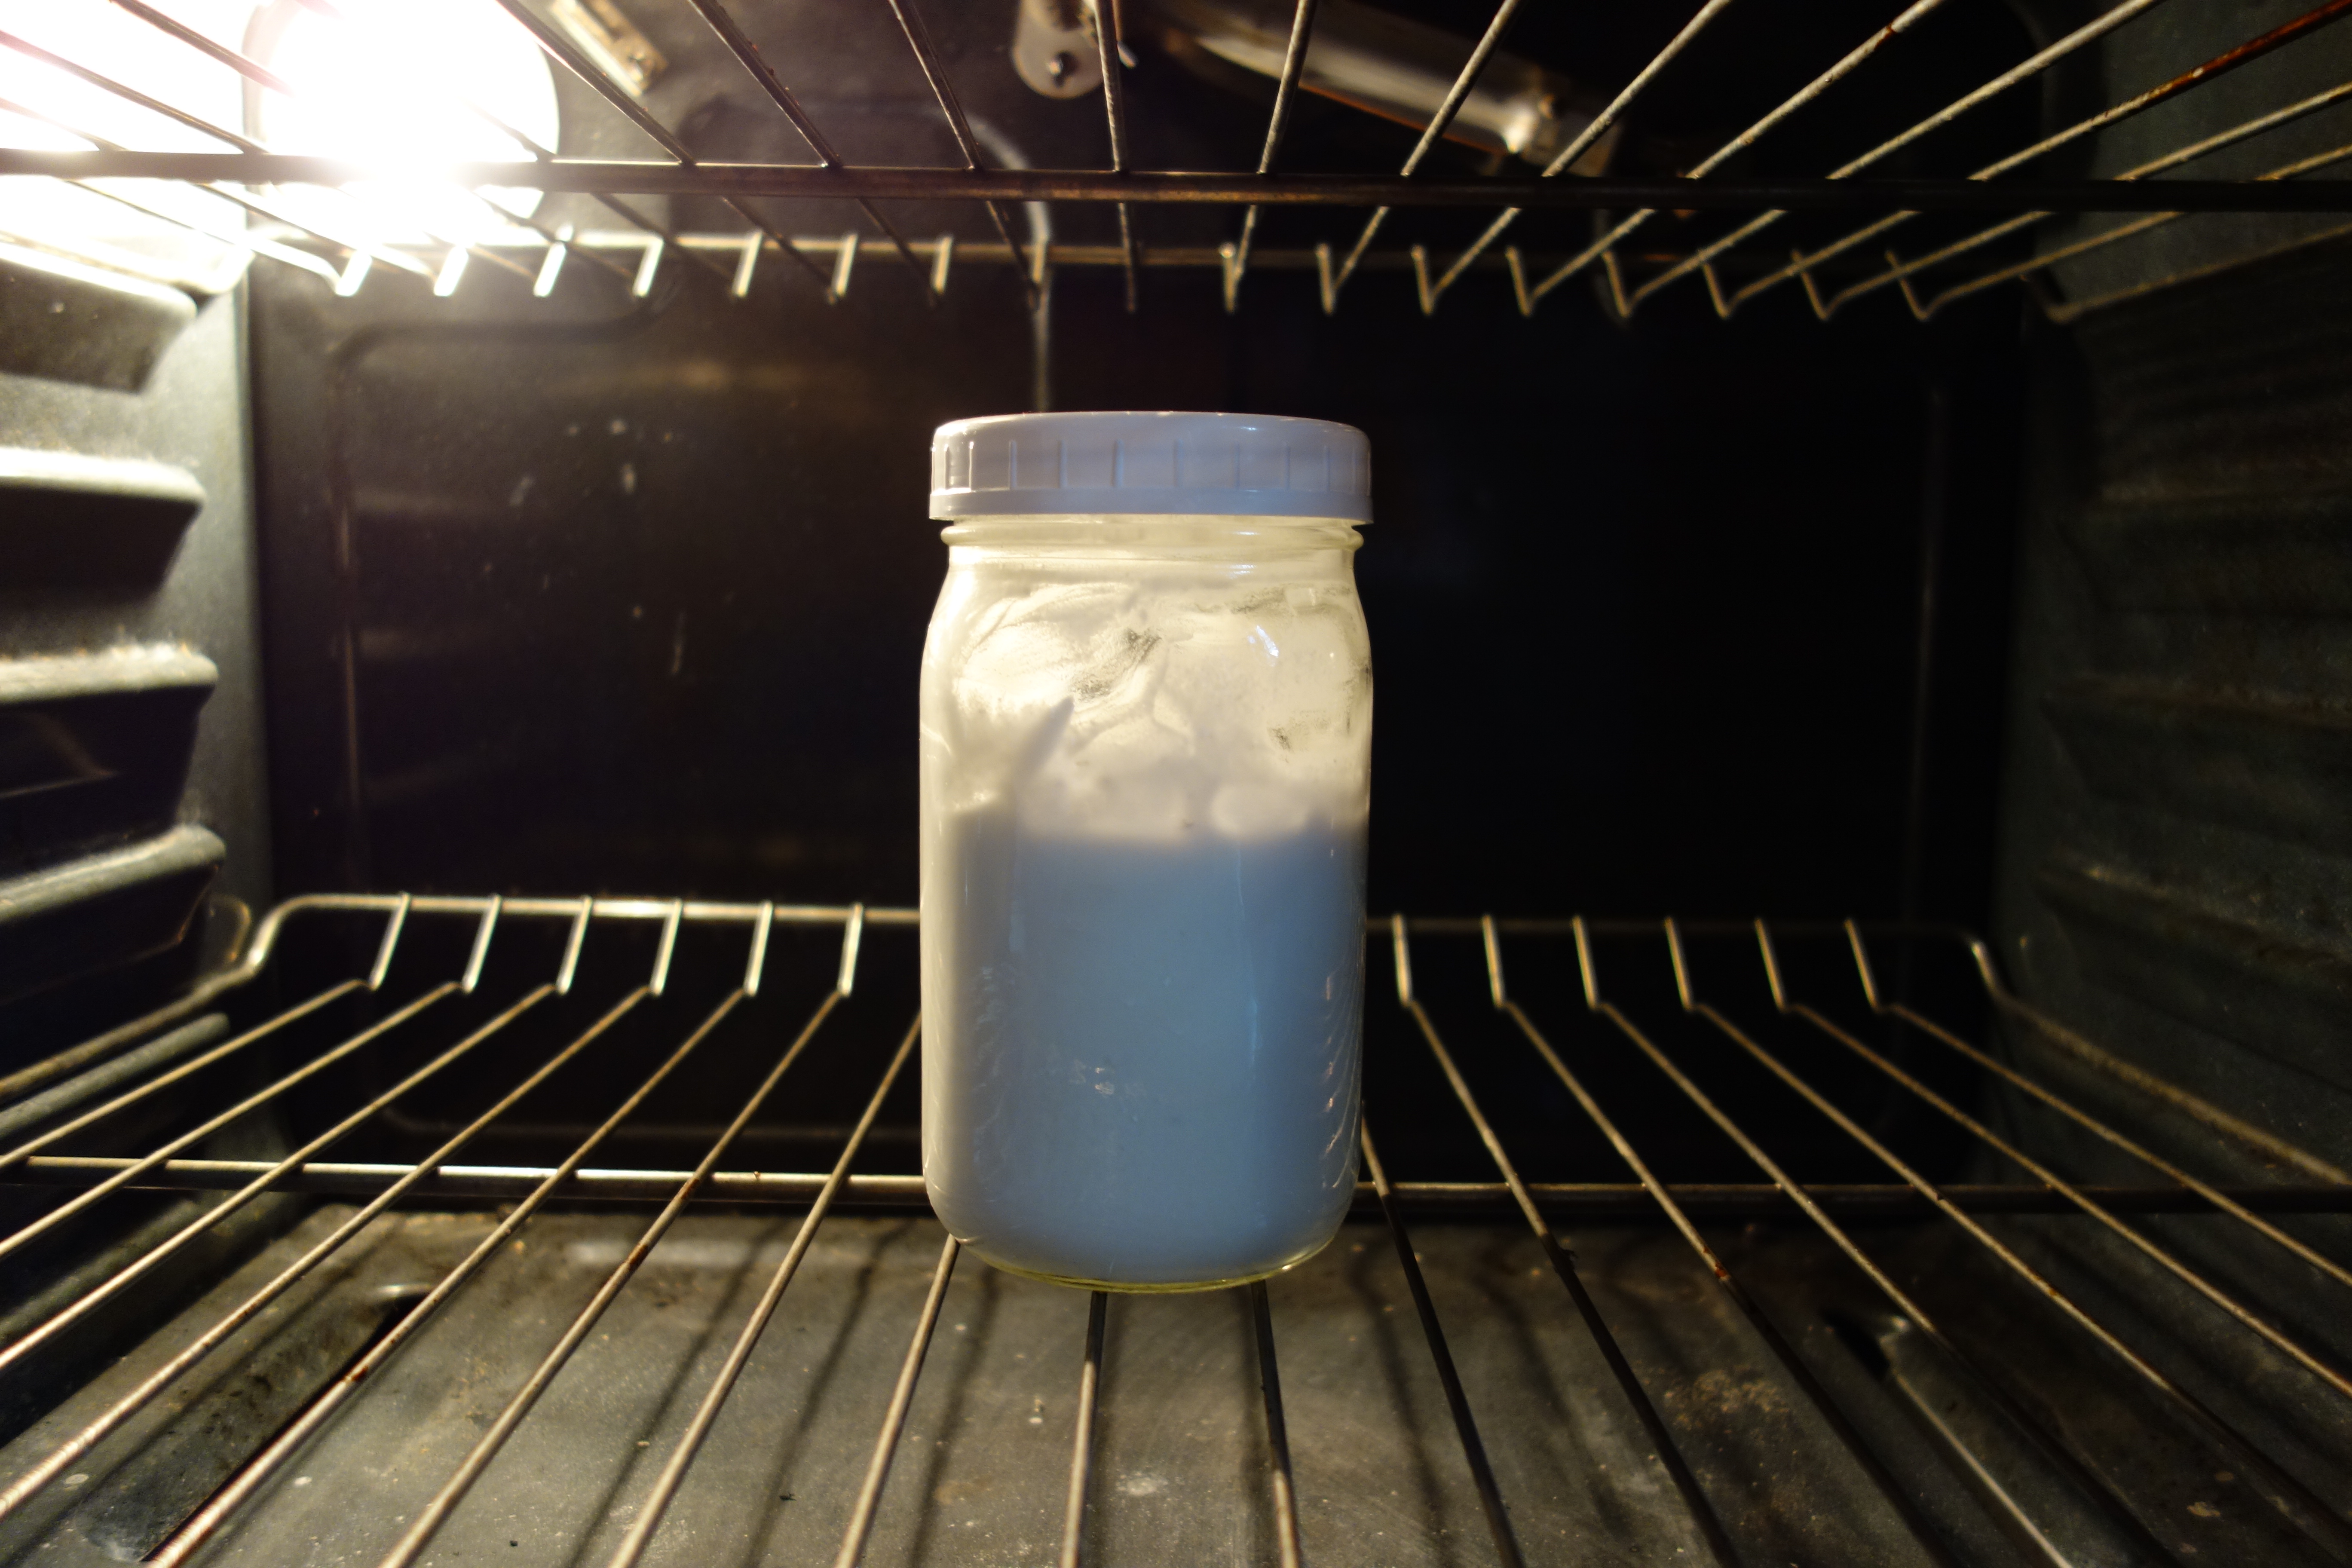
 To make sure I wasn’t going to kill anyone with this yogurt, I consulted Cultures For Health. They have a nifty table with easy, straight forward, step-by-step instructions for making yogurt. I followed the last column, ‘Direct-Set Starter with Alternative Milk’, but skipped the part about heating the milk. I know we’ll likely drizzle a little honey or serve the yogurt with fruit, so I didn’t add sugar. We like tangy yogurt so I waited 24 hours before taking mine out of the oven.
After the fermentation was done, I opened the lid and stirred the milk, which had separated. It bubbled up to the top of the jar and eventually settled back down. I put the lid back on and placed it in the fridge to thicken up. The next day I gave it a taste test and was pleased with the taste. The coconut milk that I used isn’t 100 percent creamy; it’s got small pieces of coconut in it, but we’re ok with that.
The yogurt got two thumbs up from Zevin. He asked for it to be less tangy next time, but that’s an easy fix. I think I’ll add vanilla to the rest of the batch, too, just to round out the flavors. His first bowl was drizzled with honey and happily gobbled up in minutes. Next Monday, yogurt is on the school’s snack calendar, and guess who’s going to be joining the the table? That’s right, a very happy boy.
Some notes before making this ridiculously easy, 2-ingredient yogurt.
- The only BPA-free can of organic coconut milk free of gums that I’ve found is Natural Value
. If you don’t mind gums but do want organic & BPA-free, try Native Forest
.
- Use whole fat coconut milk.
- Refrigerate the can overnight to allow the cream to thicken & the water to settle at the bottom. Keep the can upright & don’t shake it before opening. Scoop the thick stuff off the top, use the water for something else (a smoothie, perhaps).
- Use a capsule of high quality probiotics or inner-ēco dairy-free probiotic (it’s a liquid).
RECIPE
- 2 cans coconut milk, full fat
- 2 probiotic capsules or 2 T liquid probiotic
- Glass jar with lid, sterilized (running through the dishwasher is fine)
DIRECTIONS
- Scoop the thick coconut milk into the jar, add probiotic, stir, close lid.
- Let sit for 24 hours in an oven with the light on (don’t turn the oven on!). Your yogurt requires a somewhat constant 108 – 11o degrees to do its thing.
- Another option is to put a heating pad on low inside of a cooler, wrap the jar in a kitchen towel (something thin verses a thick bath towel) and set the jar in the cooler. Close the cooler & let sit for 8 – 24 hours.
- When yogurt reaches desired tang, place in refrigerator for at least 6 hours.
More with Mangos
The golden flood of spring mangos is still in full force and we’ve been taking advantage of this bounty. We’re eating lots of them fresh, saving most of the dried and pureed ones for later when fresh ones are no longer available.
Two nights ago I made a fresh mango salsa. Mango goes great with most meats, and since I’d already slow roasted a chicken earlier in the week, I wanted to use the leftovers.
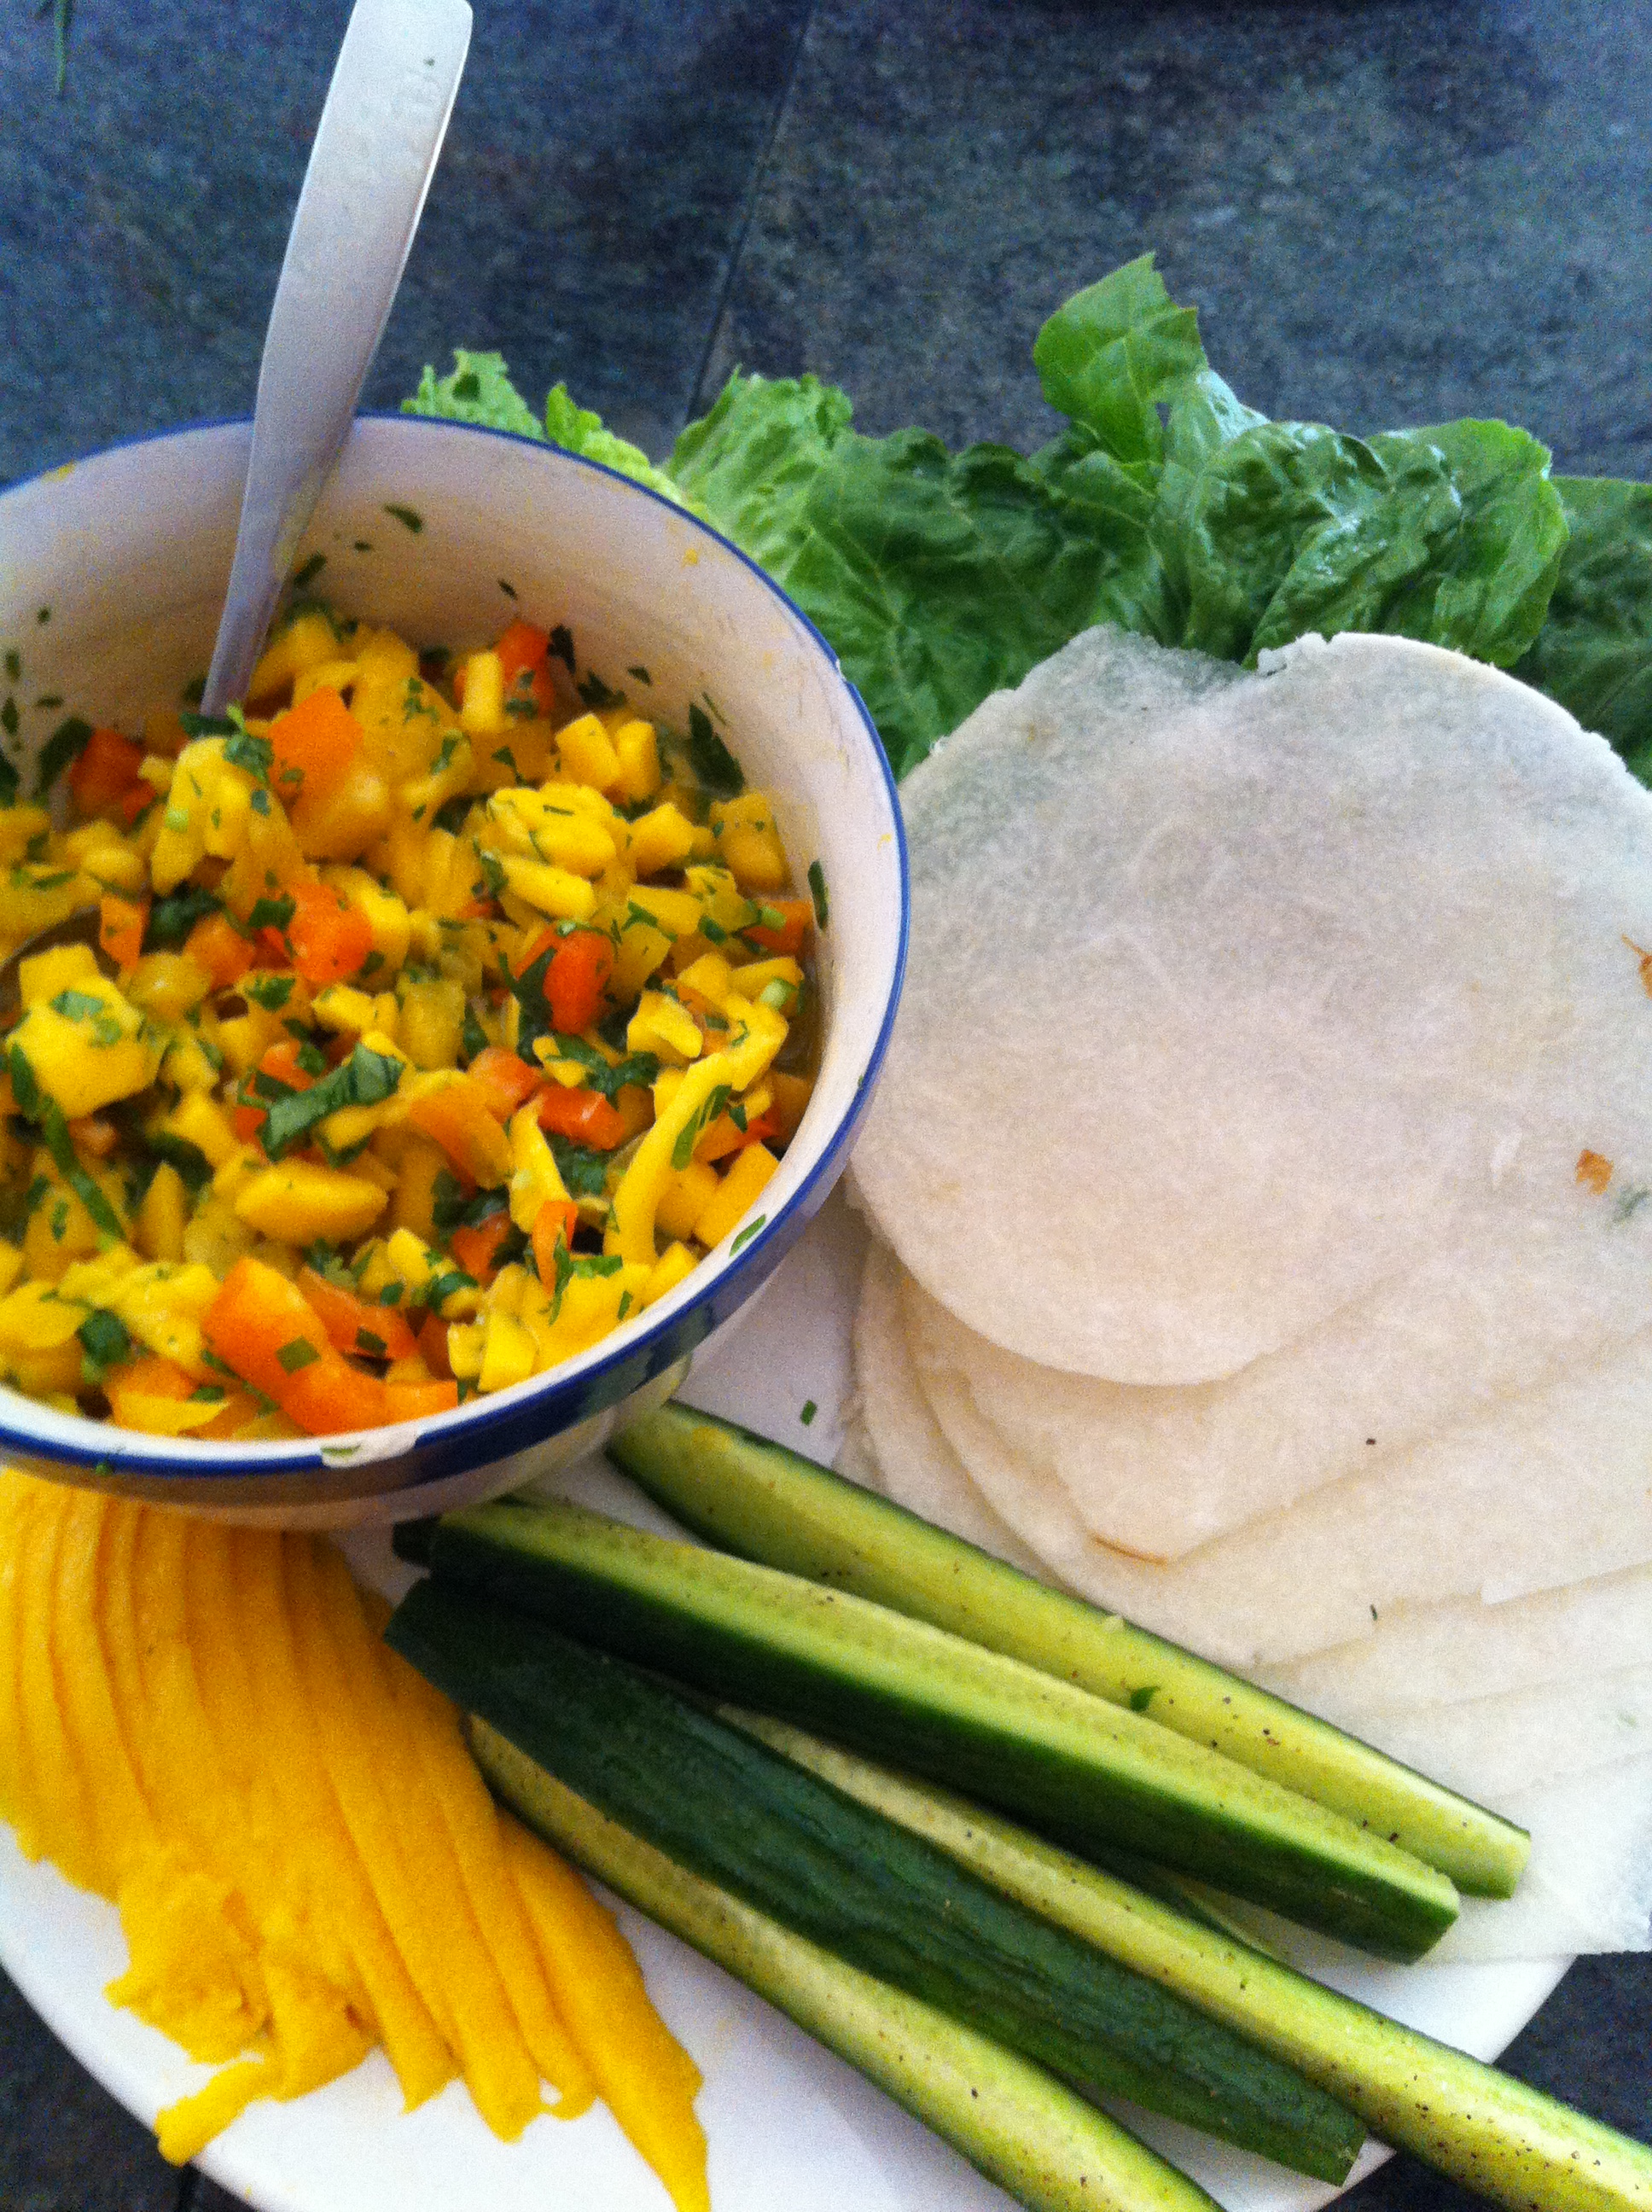 Salsa and chicken? Sounds like tacos! Since I can’t eat grains, Zevin’s allergic to corn and we steer clear of processed foods, we usually just skip taco shells and go the route of the lettuce wrap. Lettuce wraps work great for hand held food and I’m usually quite content with them. With tacos, though, I wanted something closer to a traditional taco shell. I wanted something more firm in my hand and little crunch for when my teeth first bite in.
A while back I came across a photo of jicama standing in for a taco shell. I don’t know who came up with the idea, but it was brilliant. Jicama is quite pliable when sliced uber thin, and it provides the bite and crunch reminiscent of a traditional taco shell. Jicama make the perfect spring taco shell because they’re light and even a bit juicy. Their slightly earthy flavor melds well with fresh spring veggies and fruit. Yes, including mango!
The salsa is quick to put together and the jicama takes only a few minutes to slice on the mandolin. You can cook some chicken from scratch, use leftovers or pick up a roasted bird from your local market to keep things fast and easy. A quick and easy meal bursting with flavor and crunch.
[bigoven-recipe url=”http://www.bigoven.com/recipe/498891/chicken-mango-tacos”]
Mango Mania
 Mangoes are marvelous. A juicy sweetness like nothing else. They’re great plain or with a squeeze of fresh lime and a light sprinkle of cumin. Smoothies turn velvety with cubes of frozen mango blended in and have you ever had a mango lassi? Wow, the coconut milk-mango combo is such a treat! Mangoes also are great as the base for chutneys and salsas. Fresh, frozen or dried, hot or cold, mangoes are amazing.
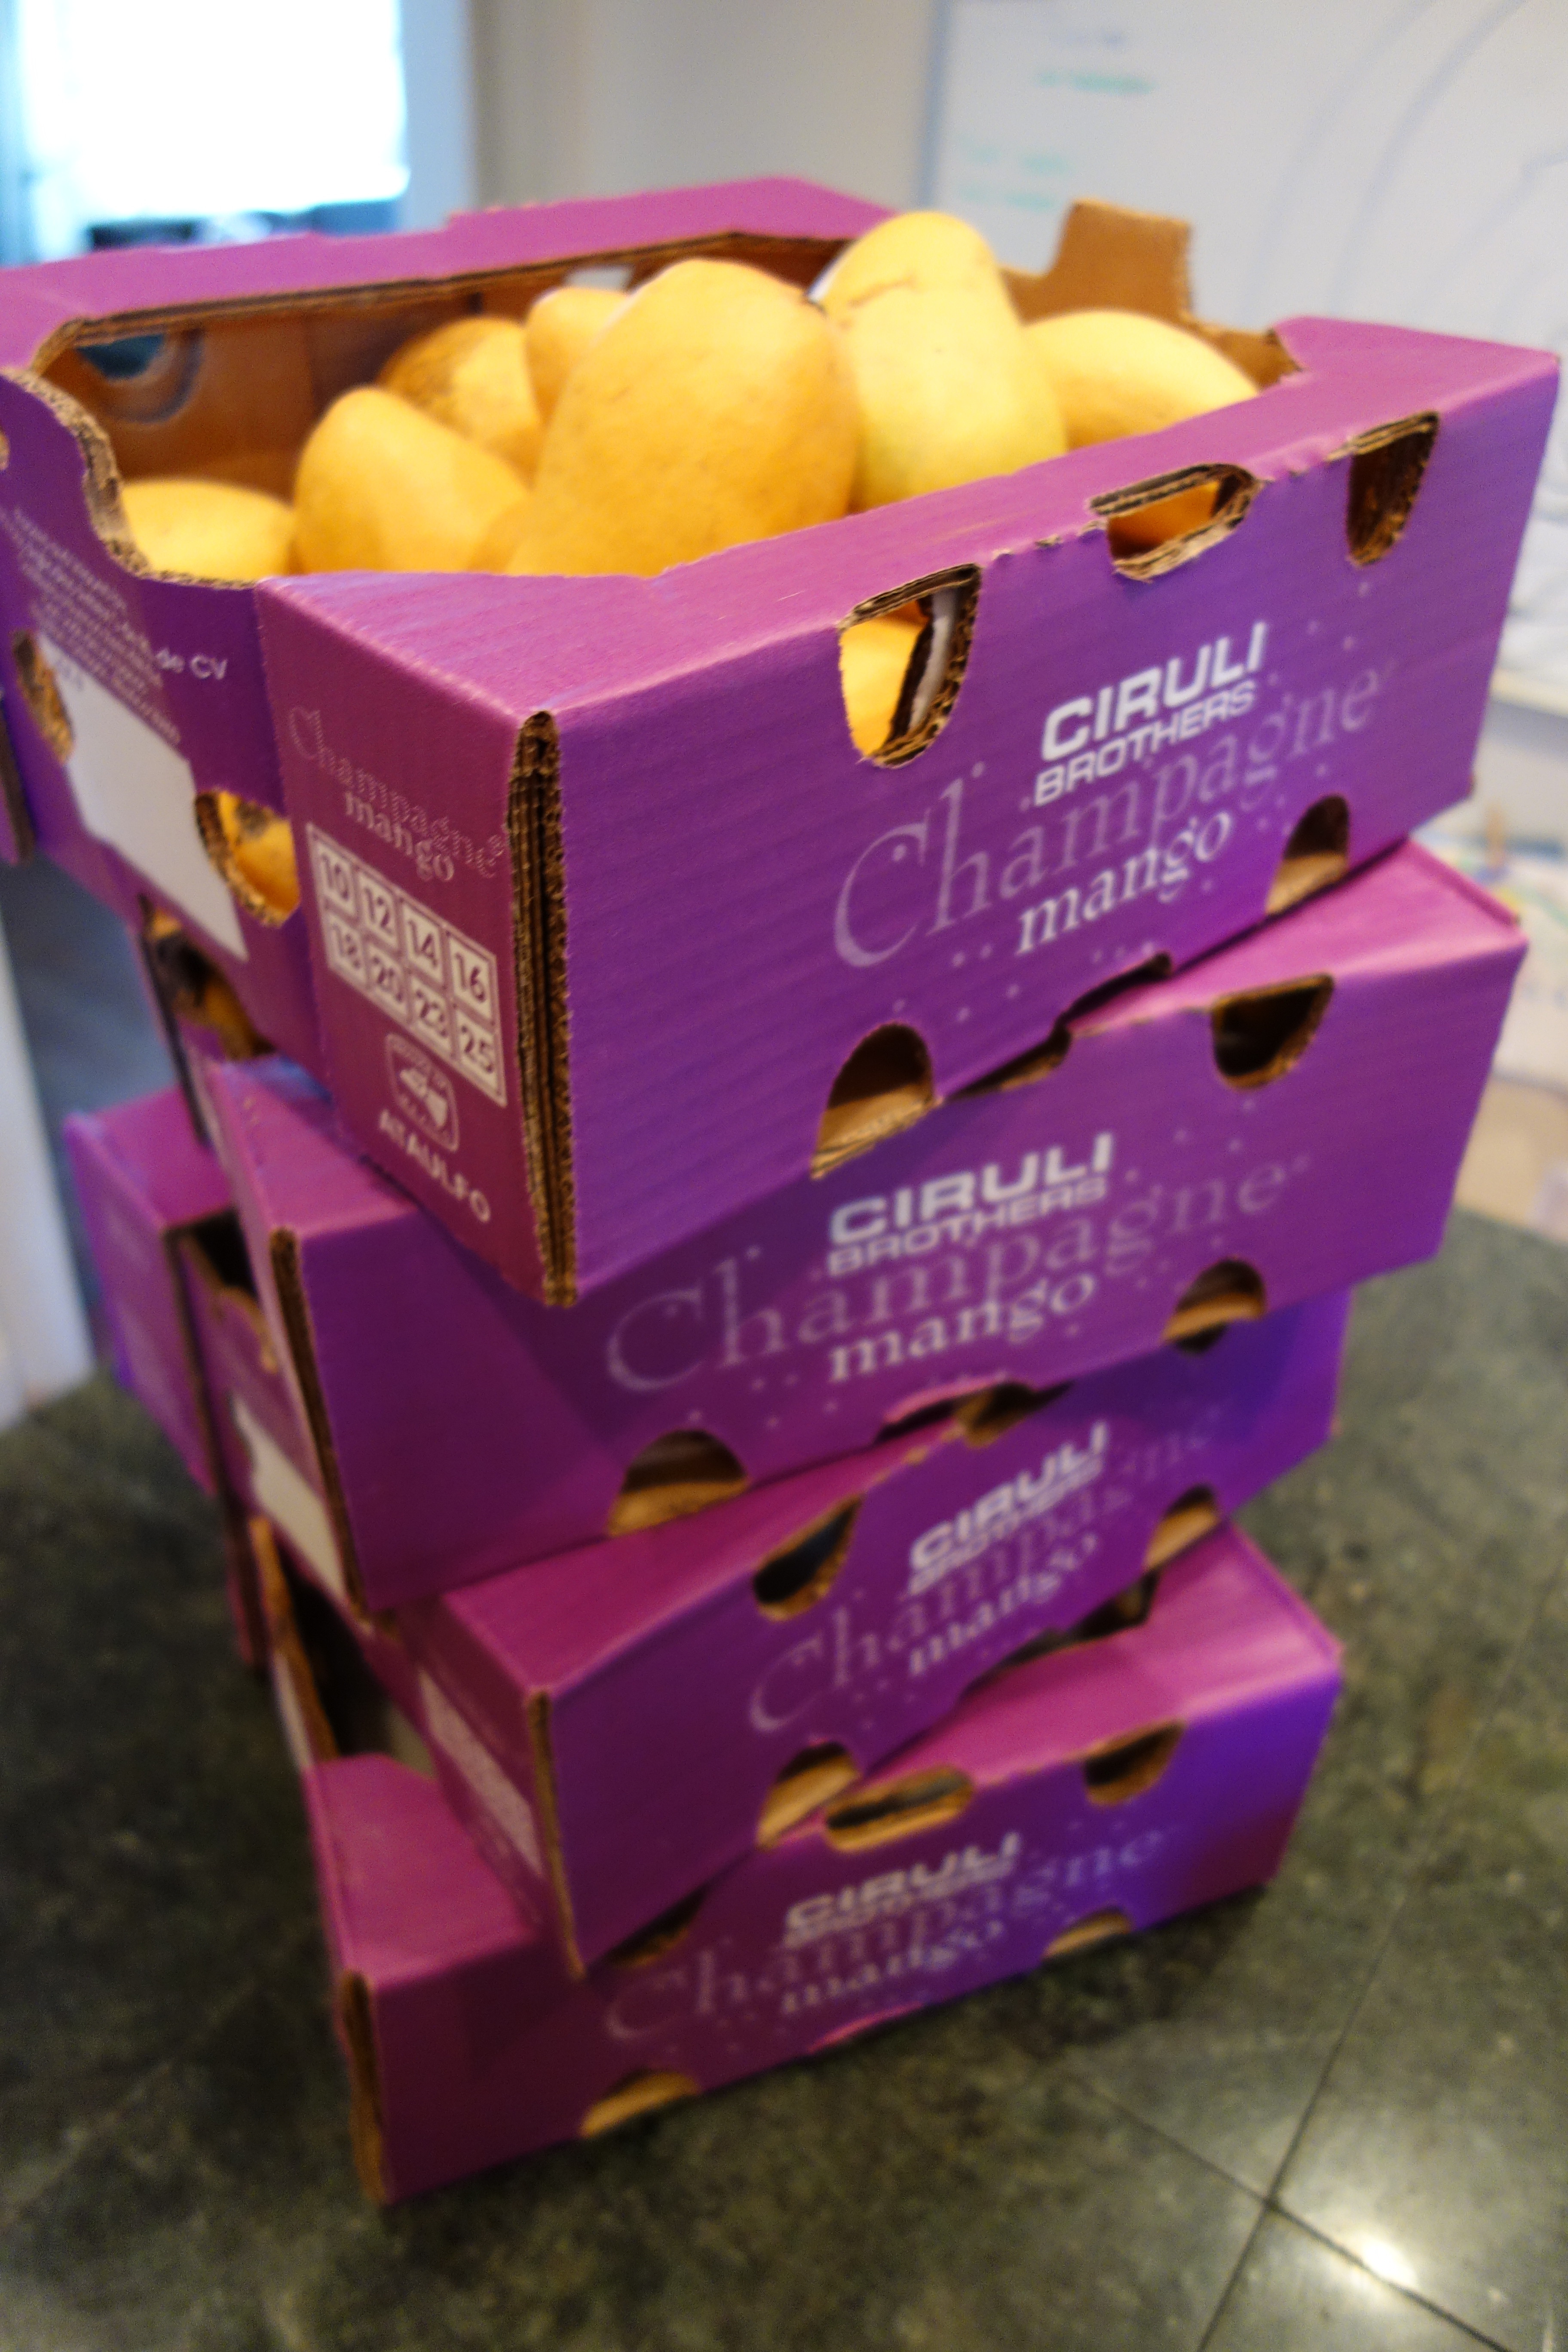
Our favorite kind is the small champagne, sometimes called ataulfo or honey, mango. They’re not stringy like their larger cousins are. The skin turns a golden yellow when ripe and inside is a brilliant orange-golden flesh with a thin, but large seed. And they are delicious. Incredible, really.
Available only twice a year, spring and summer, they’ve been for sale here in Seattle recently. We do love them, but they’re pretty expensive. Recently, though the sale was so awesome that I decided to stock up; we bought six cases of 12.
 But fresh mangoes don’t last very long, so what do to do? Eat them, dehydrate some, eat some, puree some, eat some, freeze some, eat some more.
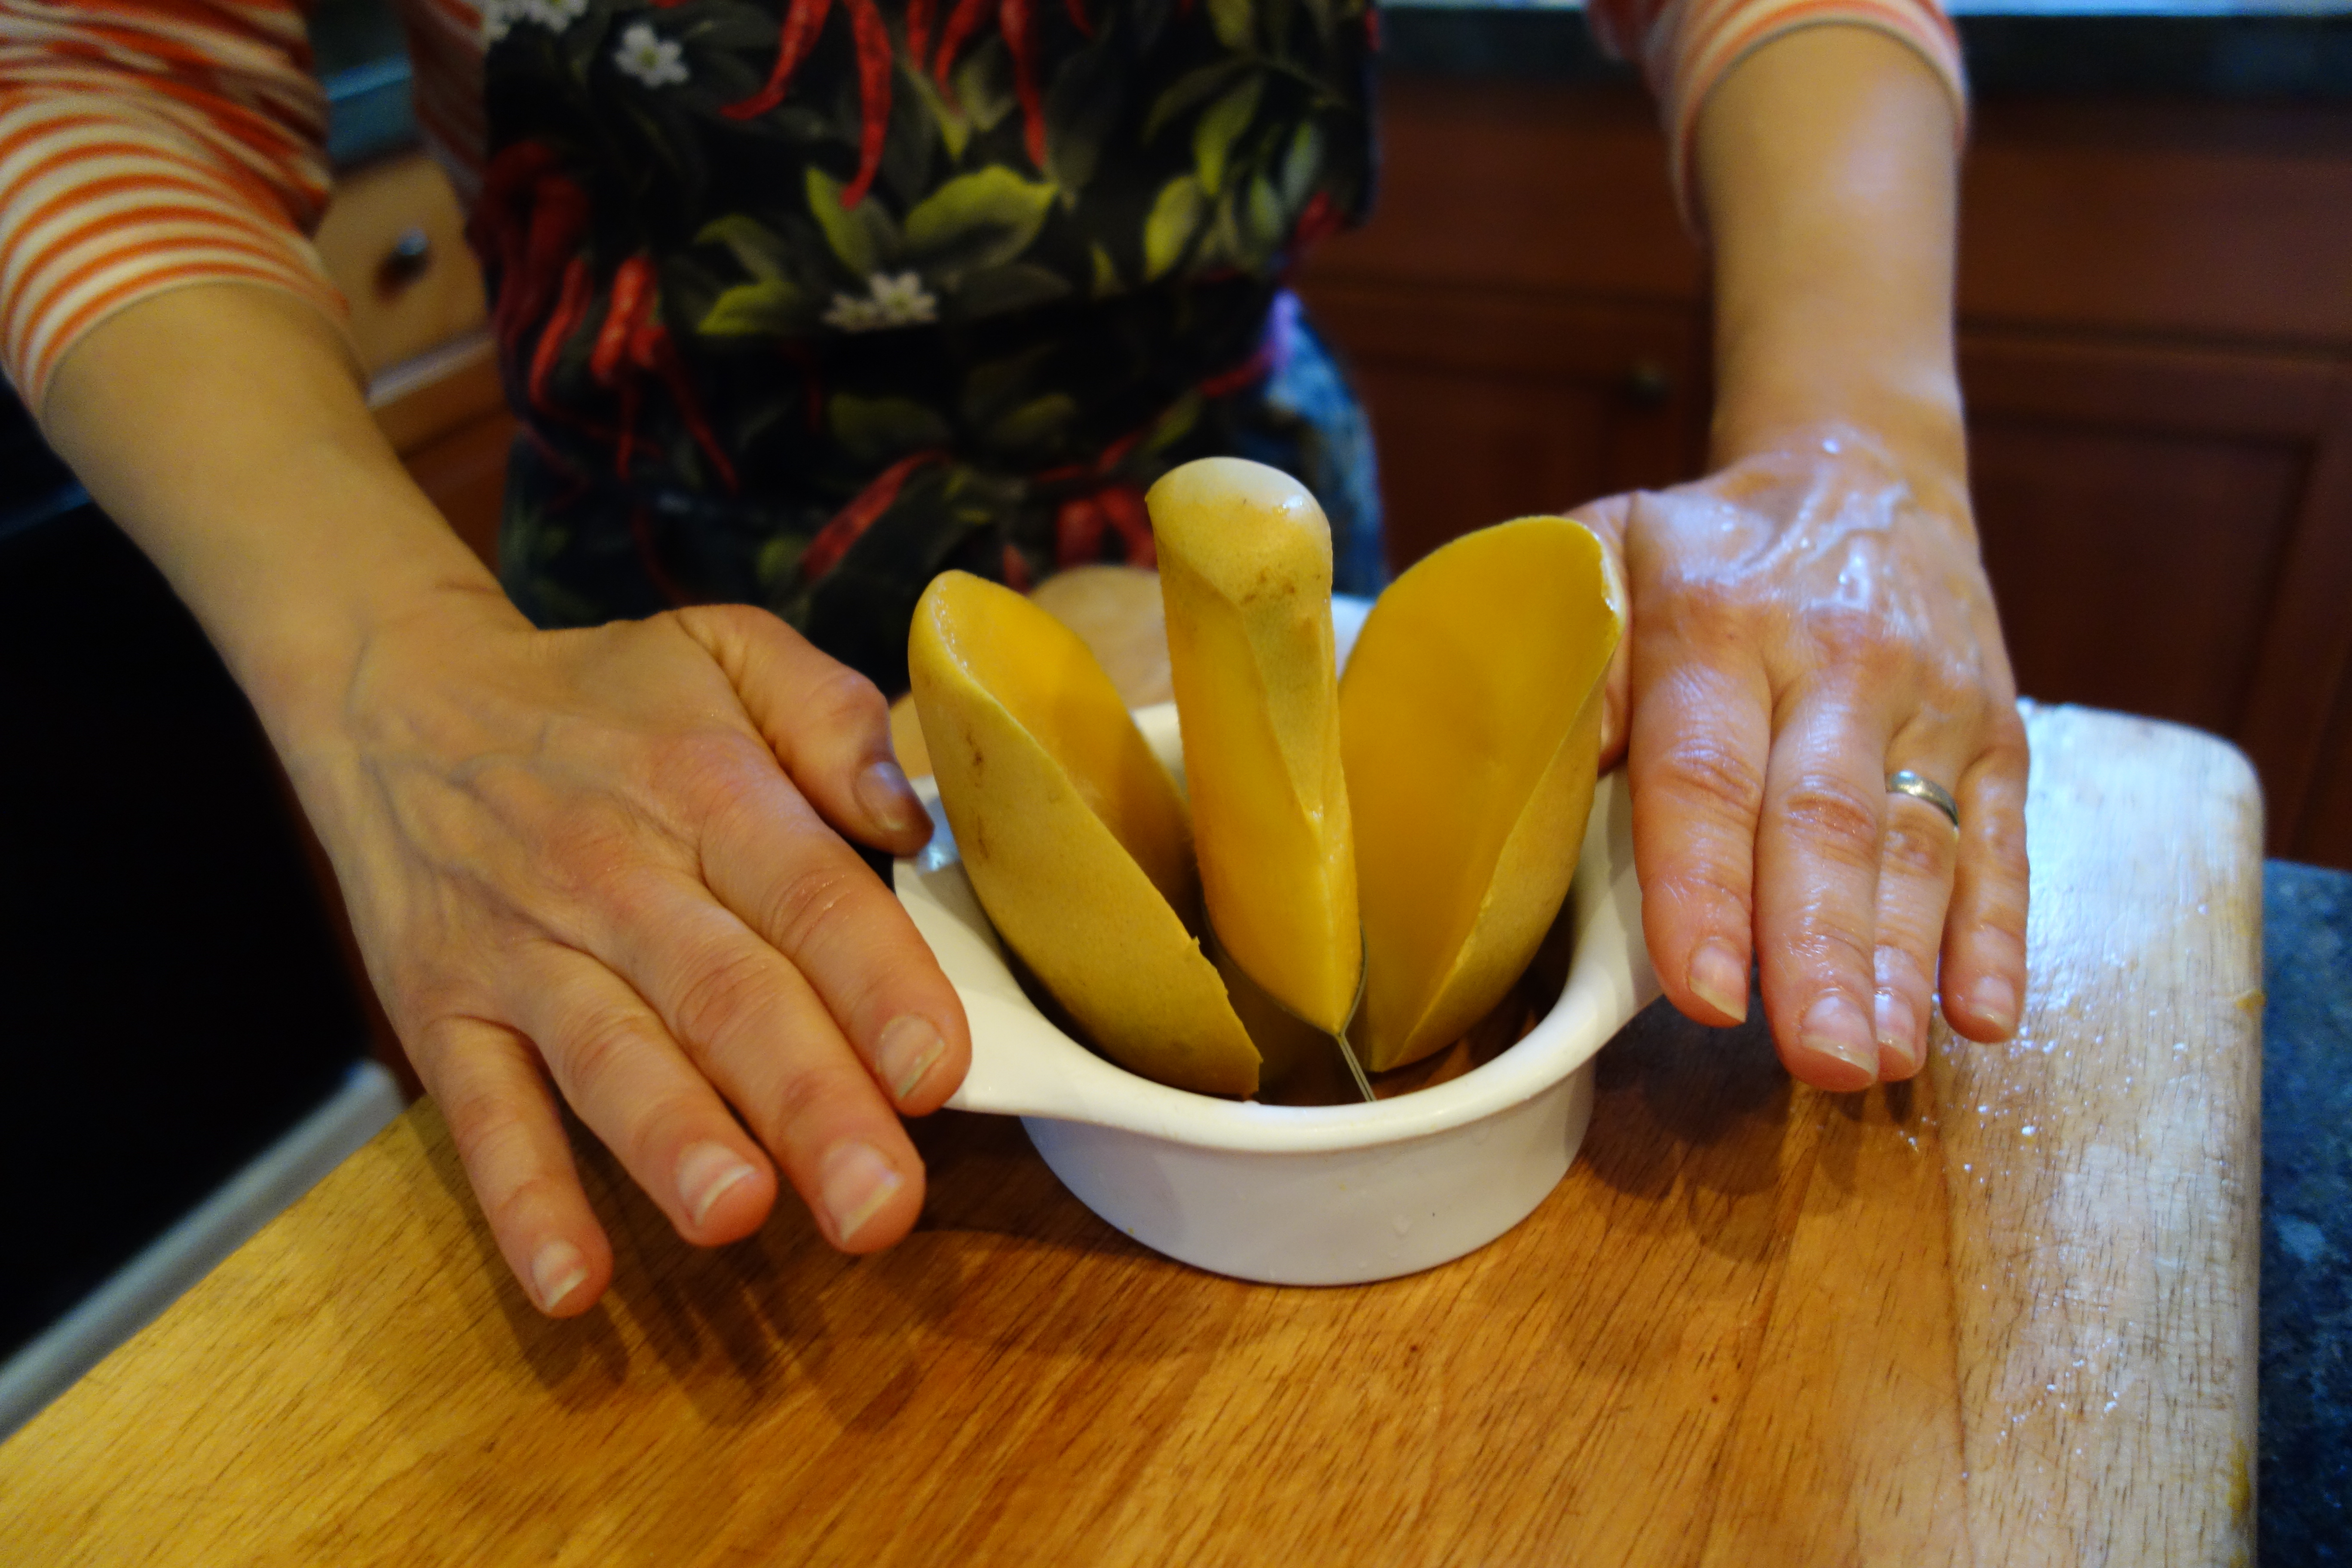
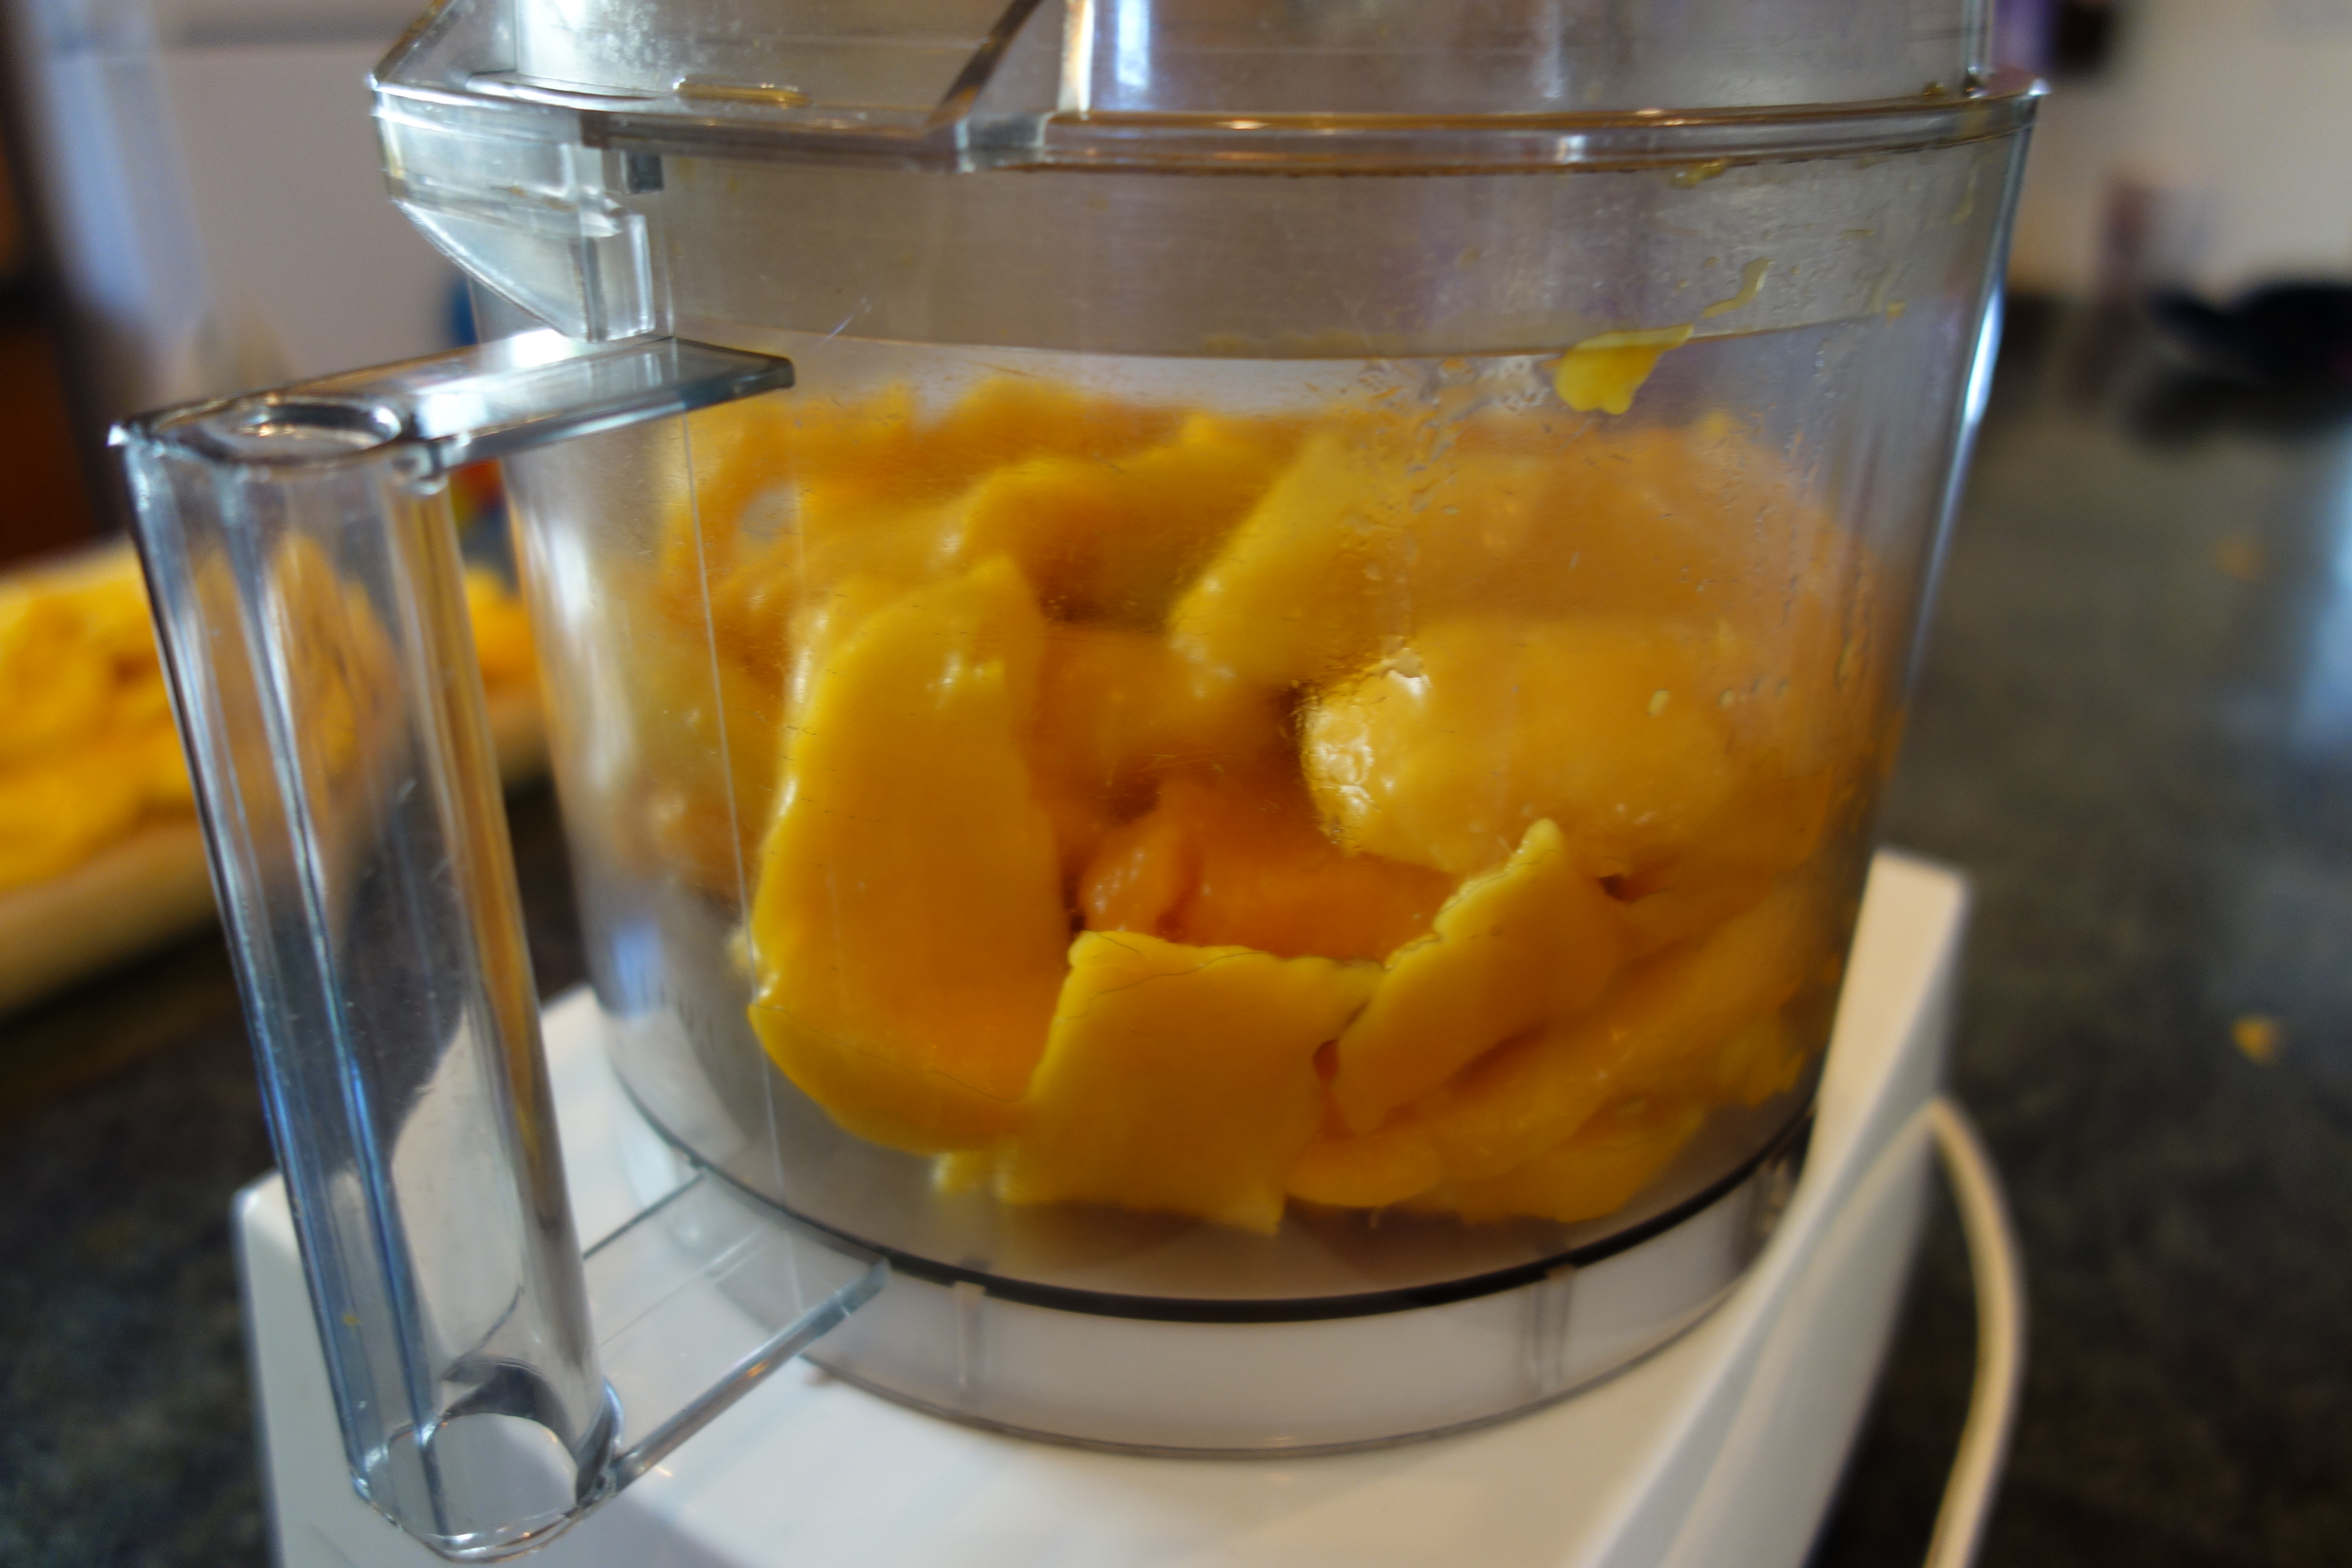
I set up an assembly (disassembly?) line to tackle the job. I rinsed them, sliced & pitted them, and scooped out the flesh. The choicest pieces were then sliced thinner to become dried mango. Anything slightly mushy or scraggly would be pureed, with the puree destined for fruit leather and mango ice cubes.
To make fast work of opening mangoes I rely on my trusty mango splitter, a gift from my mother-in-law a few years back. That slicer changed the way we look at mangoes in this house. I used to avoid buying them regardless of their succulent flesh because the seeds can be a beast to remove. Then came the magical mango slicer, and we’ve been enjoying copious fresh mango ever since.

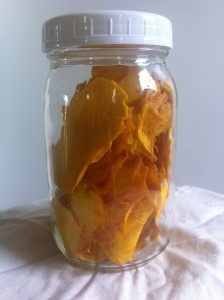
This was the first time I’d dehydrated mango, and now I’m hooked. We used the Nesco FD-60 Snackmaster Food Dehydrator, and not only is ours so much less expensive than store bought, it’s far superior. The slices are dried but not at all dry or tough. They retain a slight, but easy chew and the flavor is much more intense than the dried mango we buy bought.
After pureeing I poured some of the mango into ice cubes trays, froze them, then popped them out and stored them in ziplock bags in the freezer. These were a hit, too: they add a delicious punch to Jordan’s morning smoothies or can be sucked on like little popsicles. Eating the cubes is yummy, but slippery!

The rest of the puree was dehydrated and, though it made decent fruit leather, wasn’t our favorite of the three preparations. Flavor-wise it’s great, but it’s a bit tough and gummy on the teeth. This was also my first foray into fruit leather dehydration, so maybe next time will be better.
And there will be a next time. It’s incredibly gratifying to prepare food for later knowing that I saved some moolah in the process. And the outcomes were so deliciously satisfying that I’m sure by the time fall rolls around, and the stores fill with mangoes again, our stash will be long gone and we’ll be eager for more.
It’s Gluten Free, but is it Healthy?
I never regret not eating gluten: I felt so bad before that it’s just a no-brainer now. I’ve accidentally eaten it and then suffered terrible reminders of what it does to me, but since I cut it from my diet a few years ago, I’ve never intentionally eaten it.
And that worked for a while. Like a sort of secular “removal of chametz“, I cleared the house of gluten and went shopping for gluten-free goodies. The taste and texture of gluten-free foods required an adjustment, but after a while of having no baked goods, no breads – well, just about anything was worth trying. So with some taste tests and a then few things immediately ditched, I found many gluten free foods to replace what was now verboten. Cereals, crackers, cookies, pasta, boxed and frozen foods. And as time passed, more and more things became available at the grocery store.
The quality of gluten free food improved, too. We tried them all and increased our pantry inventory. We ate gluten free waffles, gluten free muffins and gluten free cereal for breakfast. Mid-morning snacks for my (then) toddler and I usually included gluten free crackers or gluten free granola bars. Lunch often found itself on gluten free bread with some gluten free chips on the side. Gluten free pasta would find its way onto our dinner menu at least twice a week along with gluten free burger buns and gluten free pizza. Gluten free treats were never in short supply, either, whether whipped up from a mix or eaten straight from a box.
We even dined out with more frequency as local restaurants jumped on the gluten free train. Plenty of gluten free buns and pastas were offered on menus alongside fries and onion rings prepared in safe, dedicated fryers. Eating gluten free became easier and tastier by the day.
That is, until the day that I realized that I no longer felt great.
I started questioning my diet and looked at what I was really eating. It was all gluten free, most of it was even organic, but it was highly processed. One of the cornerstones of eating healthy is variety, but after reading several packages one thing was clear – they all had the same basic ingredients, and those ingredients weren’t particularly healthy, either: rice flour, potato starch, xanthan gum, and sugar in some form or another topped the list. None of those provides much nutrition and practically zero dietary fiber.
These gluten free treasures were full of processed starches and white sugar. Are they safe for someone on a gluten free diet? Sure. Are they healthy? Most often, no. And, to add insult to injury many aren’t even fortified the way other processed food is so they’re utterly lacking in vitamins. Processed foods have the good stuff processed right out of them so the FDA requires that nutrients be put back in. However, gluten free foods are not required to be fortified.
What would make me feel better? What is our bodies need to fuel themselves? Our bodies need nutrient-dense, healthy foods. Many of modern health ailments didn’t exist before processed food, or at least not in the numbers that they appear today. So if we were healthier before we started putting food in boxes, what did that food look like? It was unprocessed . These foods are called whole foods because they’re basically unchanged from how they grew or lived. I guarantee that you won’t find crunchy, airy cheese puffs growing in a field or vines of multi-colored licorice draped in trees (except perhaps, in the factory at right). And if you eat meat, it probably didn’t grow with nitrites or fillers.
So I did another pantry overhaul. I knew that a healthy diet was based on whole foods – foods that have no processing, that look like they did when they grew or walked or flew. I’d plan meals around vegetables, meats, nuts, seeds, and fruit. I even changed the fats we use – no more processed oils like canola or grape seed. Instead we’d use butter, olive oil and coconut oil. Anything that came in a package was scrutinized – was the ingredient list made of real food? Were they whole foods? I allowed for nut flours and coconut flour because they’re basically a whole food, they’re just ground up. Nothing was chemically altered, no ingredients added to make the product. Same thing with nut butters. I even found some crackers and packaged snacks that met this criteria.
I kept a few packaged products like gluten free pasta, rice crackers and truly wholesome granola because I knew that I’d occasionally need a few quick-fix solutions, especially until I got this new whole foods eating plan working for our family. Our pantry was now pared down considerably and our fridge and freezer more filled with meats and produce. At first I spent a lot of time in the kitchen prepping and cooking but as time went on I developed strategies to minimize my kitchen time and still turn out healthy, tasty meals. It’s certainly more work than ripping open a box and adding water, but not much and we all feel great and that’s worth all the time in the world, if need be.
If completely overhauling your pantry seems daunting, here are three high-impact things you can do to reduce your reliance on processed foods:
- Cut up several days worth of carrots, peppers or other crunchy vegetables in advance, then store them in a clear jar in your fridge. Grab these when you when you want something to munch on.
- Instead of the toast that goes with your plate of eggs in the morning, try putting your egg on a bowl of quinoa or even oatmeal. Sprinkle a little salt and drizzle a little honey for a sweet-and-savory and satisfying breakfast.
- A great substitute for sliced “lunch meats”: real meat. Grab a pre-roasted chicken from PCC or Whole Foods, then pull it off the bones for convenient snacking.
Hidden Gluten Ingredients
Shopping for gluten free has become much easier in recent years. Many packages promote their status with splashy labels of “GF” or even “certified gluten free”.
 But what about the packages that don’t have those handy words printed on them? Do you just read the ingredient list and look for the word ‘gluten’? Or maybe check to see if it says ‘wheat’? If you must avoid gluten, neither of those words is enough.
Since gluten is found in barley, wheat and rye, those words are great starting points, but gluten is often hiding out in the ingredients list under other names. It’s hiding in there and your job is to identify it and avoid it.
Malt flavoring? It comes from barley, doh! Seiten? Sure, it’s vegetarian – but it’s got wheat!
Now here’s the really tricky stuff: these things don’t even sound like foods, much less like gluten. Hydrolyzed plant protein? It can be derived from a gluten-containing plant. Dextrin? Unless it’s labeled gluten free, it might come from wheat. Triticum vulgare germ extract? It’s basically wheat germ oil.
Other key words to be wary of include filler, coating, natural flavoring, natural coloring, binding, starch and stabilizer. These can all contain gluten, unless specifically labeled otherwise.
Foods that often seem fine at first glance, but are not upon closer inspection include soy sauce (but not tamari), teriyaki sauce, vegetable broths and bouillon.
There are a number of good lists online of “hidden gluten”, but I’ve found celiac.com to be one of the most extensive. They have an ‘unsafe ingredients’ list as well as a ‘safe ingredients’ list. I recommend bookmarking them on your smart phone so that you can call them up while you’re shopping. When I changed to a gluten free diet I relied on these lists until I became familiar with some of the more common terms.
Finally, note that although oats are inherently gluten free, sensitive individuals may experience trouble eating them. Cross-contamination with gluten during the growing, transporting, processing or packaging of oats can occur, so always look for the gluten free label if you buy oats. Also, people who can’t eat gluten frequently have problems with oats regardless of their gluten free status.
Passover 2013

Fortunatley, we found a very tasty “matza-like” alternative: Yehuda Gluten Free Matzo Style Squares. They’re tasty, a bit sweeter than their glutinous cousins, and just as difficult to break along the scoring. The matza, made from potato starch, is kosher, but not for “sacramental purposes”. Since we can’t have gluten, though, these work as a suitable replacement for our family.
Of course, our family has about 20 other foods on the “no” list, but I actually enjoy the challenge of creating a menu that will accommodate everyone’s diets and still be thoroughly enjoyable and memorable.
For a seder (the Passover ceremony and meal), there are a few traditional dishes that I use as my base, and then, keeping in mind what’s safe for all diners to eat, I make a menu.  This year we ate:
- Matza & Charoset
- Deviled Eggs
- Matza Ball Soup (thank you, Elana’s Pantry for the matza ball recipe)
- Green Salad with Jordan’s Famous Dressing*
- Roasted Sweet Potato Strips
- Roasted Balsamic Asparagus
- Roasted Beets with Orange Zest
- Applesauce
- Brisket
Followed by
- Almond-Strawberry Mini Cupcakes (topped with coconut whipped cream)
- Chocolate Coconut Mini Cupcakes (topped with coconut whipped cream)
- Linzer-like Cookies (I substituted sugarless fruit jam for the date filling)
For the matza balls, Elana’s pantry recommends some specific almond flours that have a fine texture. We didn’t have those, so I substituted Bob’s Red Mill Almond Meal/Flour instead. The matza balls came out tasting very much like a “regular” matza ball, but with a slightly grittier texture, at least when they first touched the tongue. It wasn’t a bad sensation, just a little jarring when you’re expecting a fluffy soft matza ball like your bubbe used to make.
Yum, right? Keep in mind that this delicious menu contained only whole foods (with the exception of the matza, but, hey – you gotta have matza!), had no grains or refined sugar. Any of the recipes could work for a host of healthy diets – whole foods, gluten-free, and paleo. Most are suitable for both SCD or GAPS.
* Equal parts 1/2 c olive oil, 1/2 c balsamic vinegar, 3 healthy “splorches” (Jordan’s words) of stone ground mustard, one hefty spoonful of honey, in a blender.
Roasted Vegetables
I love vegetables. Just about any way they can be served, I’m gonna be happy. But roasted veggies are especially nice, because the high heat brings out the flavors, especially in the sweeter ones.
 Plus, it’s easy! I roast mine at 425. The timing depends on the vegetable itself and the size of the pieces you’re roasting. Whole, medium sized beets need at least 45 minutes but something softer and smaller, like brussel sprouts, might be done in as little as 20 minutes. If you’re not sure how long your veggies will take, set your timer for 15 minutes. When time’s up, poke with a fork. Too hard? Keep cooking. Reset for 10 minutes & then poke again. Keep setting your timer so that you remember to check.
After you’ve done this a time or two you’ll get a feel for how long different veggies take and how the size of your pieces affects cooking time. If you’re going to make a mix of veggies in one baking dish, cut denser veggies smaller & leave softer ones a little bigger. This way they’ll be done at the same time.
Beets can be peeled & cut to cook with other vegetables, but red ones might bleed out onto lighter colored veggies. If you plan to cook beets by themselves you can actually roast them with their skins on, which makes peeling so much easier than raw. I rinse my beets, place them in a glass baking dish with a little puddle of water in the bottom & drizzle a tiny bit of olive oil over them. I tightly cover the dish with foil. A tight seal on most roasting vegetables isn’t essential, but for beets it is. You want to create enough steam to cook this dense vegetable, and the steam also helps the skin separate. Wait at least 40 minutes (don’t peek before 40!) to test your beets for doneness. If you’re worried about them burning on the bottoms just give the pan a little shake to roll the beets a bit. To test, poke with a fork. I like mine to allow a fork to easily penetrate, but not be too soft.
When the beets are done, take them out of the oven, and if time allows, secure the foil over the tight and let them cool. This makes the skins super easy to remove. If you don’t have time for this, no problem, cool with the foil off.
To remove the skins, use a kitchen towel. Sometimes the beets stain, so you may want to use an old one. Place the beet in the center of the towel, pick it up and rub the skin off. It should fall away pretty easily. I’ve found red beets to give up the skins more easily than the gold.
I use a glass baking dish and fill the bottom with a single layer of cut vegetables, generously drizzling olive oil & a sprinkle of coarse sea salt before covering with foil. Then I place in the oven, set the timer & do a little clean up while waiting for them to be done.
Helping You Eat
 I had a puzzling conversation with a friend last week that snapped the work I’ve been doing with my food workshop into focus.
What she told me, in essence, was that her child had chronic digestive issues as well as a litany of other ailments, including asthma and eczema, some of which were requiring increasing medication, and she had her own set of health issues. She told me that she was sure that food sensitivities were at the root of many, if not all of these problems.
Then she told me “I know I should change our diet, but I just can’t.”
I’ll admit, I was flabbergasted, at first. You know that the things you’re putting into your own and your child’s body are causing long-term harm, but you “just can’t” stop? Are you addicted? Do you have not have access to alternatives? Do you not care?
But the more I thought about it, I realized that the answer was simpler. She didn’t mean “I can’t change”, she meant “I don’t know how to change, I don’t know where to start and I can’t figure out how to figure it out.”
Now that, I get. I’ve had my share of obstacles in my life where I simply didn’t know where or how to start solving a problem, didn’t know what the first step was, and that’s where the process ended. I saw the problem in front of me like a huge, smooth wall stretching out to the horizon in both directions. My eyes glazed over, I shrugged, turned around and walked the other way.
But for this particular problem, the one that she has, the one that so many of my friends and neighbors have, I do know how to to change, I do know where to start. I faced this exact problem myself: My family and I suffered from one health ailment after another, the most serious being that my pancreas stopped producing essential enzymes, my husband suffered from colitis, and my son experienced debilitating and terrifying digestive issues. I spent literally years researching and experimenting, trying to learn new ways of feeding myself and my family, knowing that whatever I came up with, I’d have to figure out a way to make it work every single day of the rest of my life.
And because I’d been through it myself, I can help my friend make the change she wants in her life, if she really wants it, that can lead to better health not only for her, but for her children as they grow up. Helping people to live happier, healthier lives? That’s a fine mission for life.
So that’s what I’ll be doing here and in my workshops: sharing ideas, recipes, news and thoughts that can help people change the way they eat to create the kind of healthy lives that we all want.
I hope you’ll come along for the ride. If you have ideas you want to share, please let me know. If you have questions you want answered, same same.
Thanks for reading. Now, let’s get started.