
recipes
now browsing by category
Coconut Milk Yogurt
 We used eat yogurt by the bucketful. Literally. A four pound container would last about week in our house.
Zevin could eat his weight in yogurt (not literally). We used to feed him tons (again, not literally) partly because he loved it and partly because it seemed like such a wholesome food choice. The yogurt we gave him was full of healthy probiotics, after all, and Zevin’s gut needed all the help it could get.
Turned out, that Zevin is allergic to dairy. Oh, sad boy! He loved (loves) yogurt.
For a while he forgot about yogurt, but his preschool offers it as one of their family style snacks and Zevin’s started asking for it again. I stock a snack stash at school for days when he can’t eat what the school provides. I used to try to match it so if they served regular crackers, Zevin could have his allergen-free crackers; if they had regular cereal with milkm Zevin could have allergen-free cereal and non-dairy milk. But yogurt, well, I just couldn’t match that one.
We tried a few non-dairy substitutes, but none were particularly great in taste or texture, and every single non-dairy yogurt contained gums of some sort and most have added sugar. I might’ve occasionally bent my rules about whole ingredients and no added sugar so that Zevin could enjoy a yogurt at school on days that they served yogurt, but guar and xanthan can both be derived from corn. And yep, he’s allergic to corn.
Arrgh, what to do? My son is such a good sport about his food allergies, but this yogurt thing was getting him down.
I thought about coconut milk yogurt but we eat so much coconut already – coconut flour, dried coconut and coconut milk – that I wanted to go a different route. And I wanted protein in the yogurt. Nut milks are often used for dairy-free yogurt, but Zevin’s preschool is nut-free so nuts were out. Then I wondered about seeds. I have substituted sunflower seed butter (sunbutter) for nut butter in recipes before. Perhaps seeds would work.
After hours (days!) of research I discovered that most seeds lack the fat content necessary for making yogurt. I did find a single recipe for making sunflower yogurt out of homemade sunflower seed milk, but after three unsuccessful attempts resulting in watery (though tasty) yogurt, I abandoned the recipe.
So back to coconut milk yogurt. It doesn’t rate high for protein, but it does have healthy fats and, as a fermented food, it offers wonderful probiotics. Best of all, Zevin can sit elbow to elbow with his friends at the snack table enjoying (almost) the same thing.
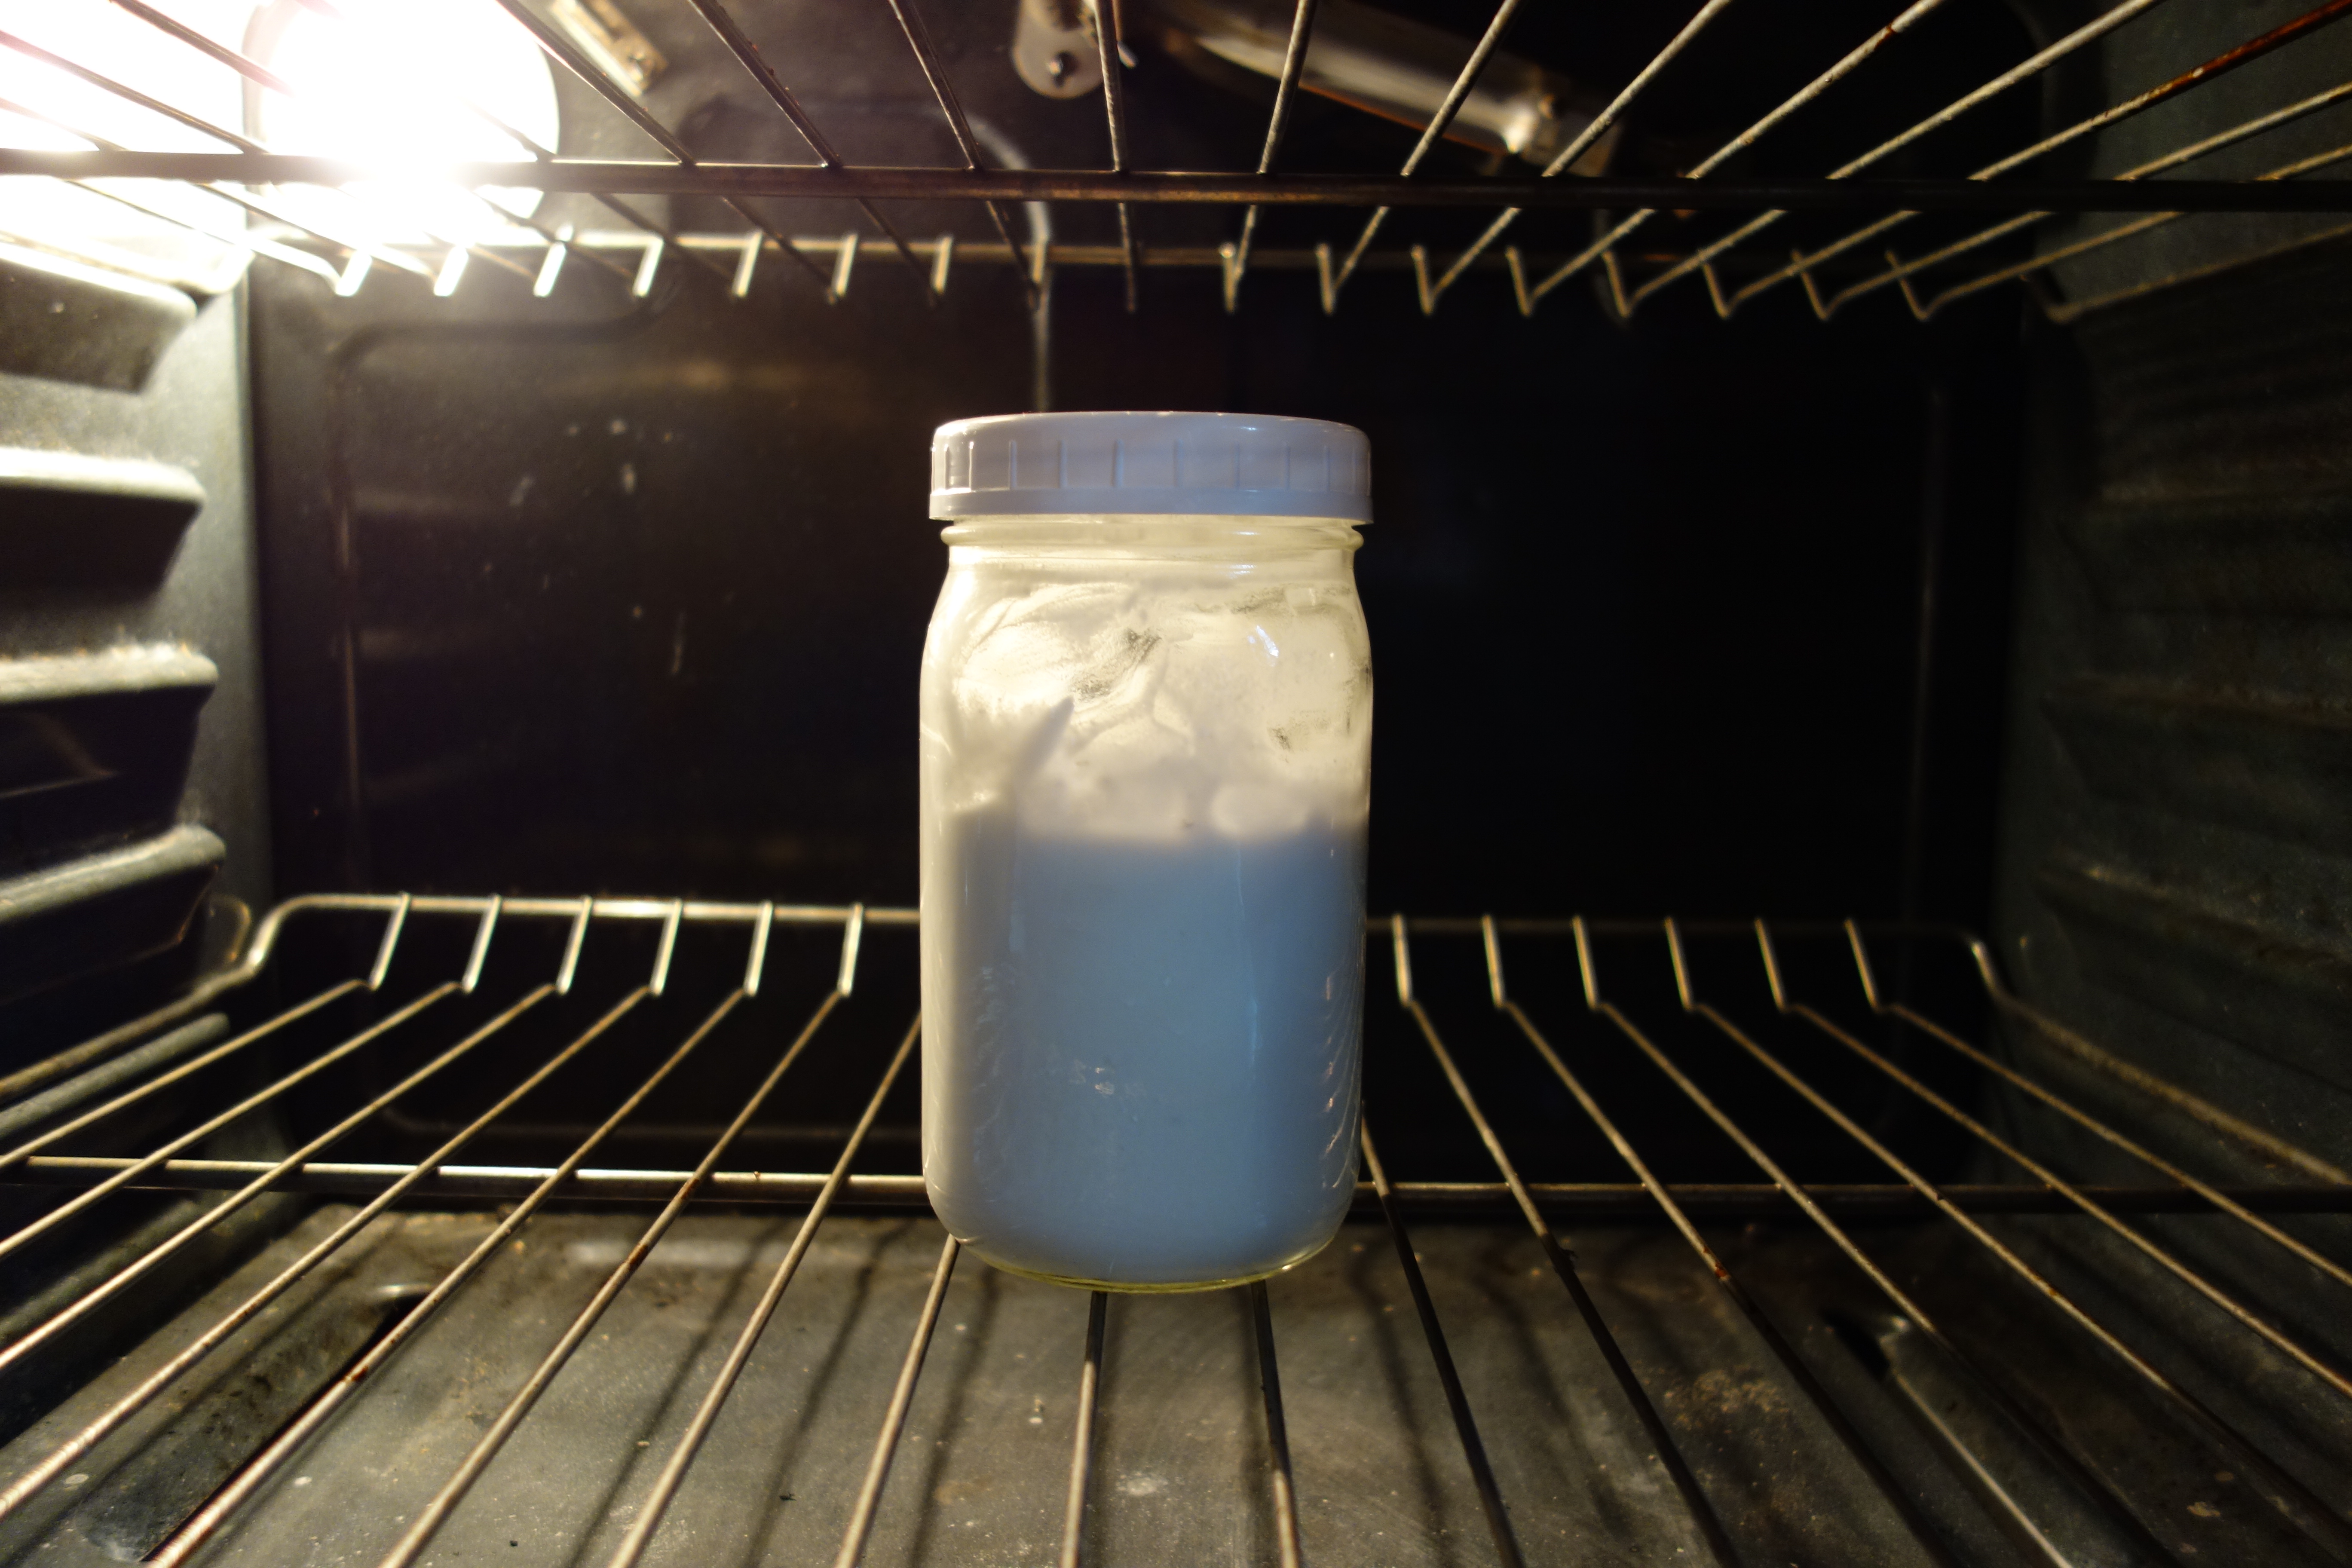
 To make sure I wasn’t going to kill anyone with this yogurt, I consulted Cultures For Health. They have a nifty table with easy, straight forward, step-by-step instructions for making yogurt. I followed the last column, ‘Direct-Set Starter with Alternative Milk’, but skipped the part about heating the milk. I know we’ll likely drizzle a little honey or serve the yogurt with fruit, so I didn’t add sugar. We like tangy yogurt so I waited 24 hours before taking mine out of the oven.
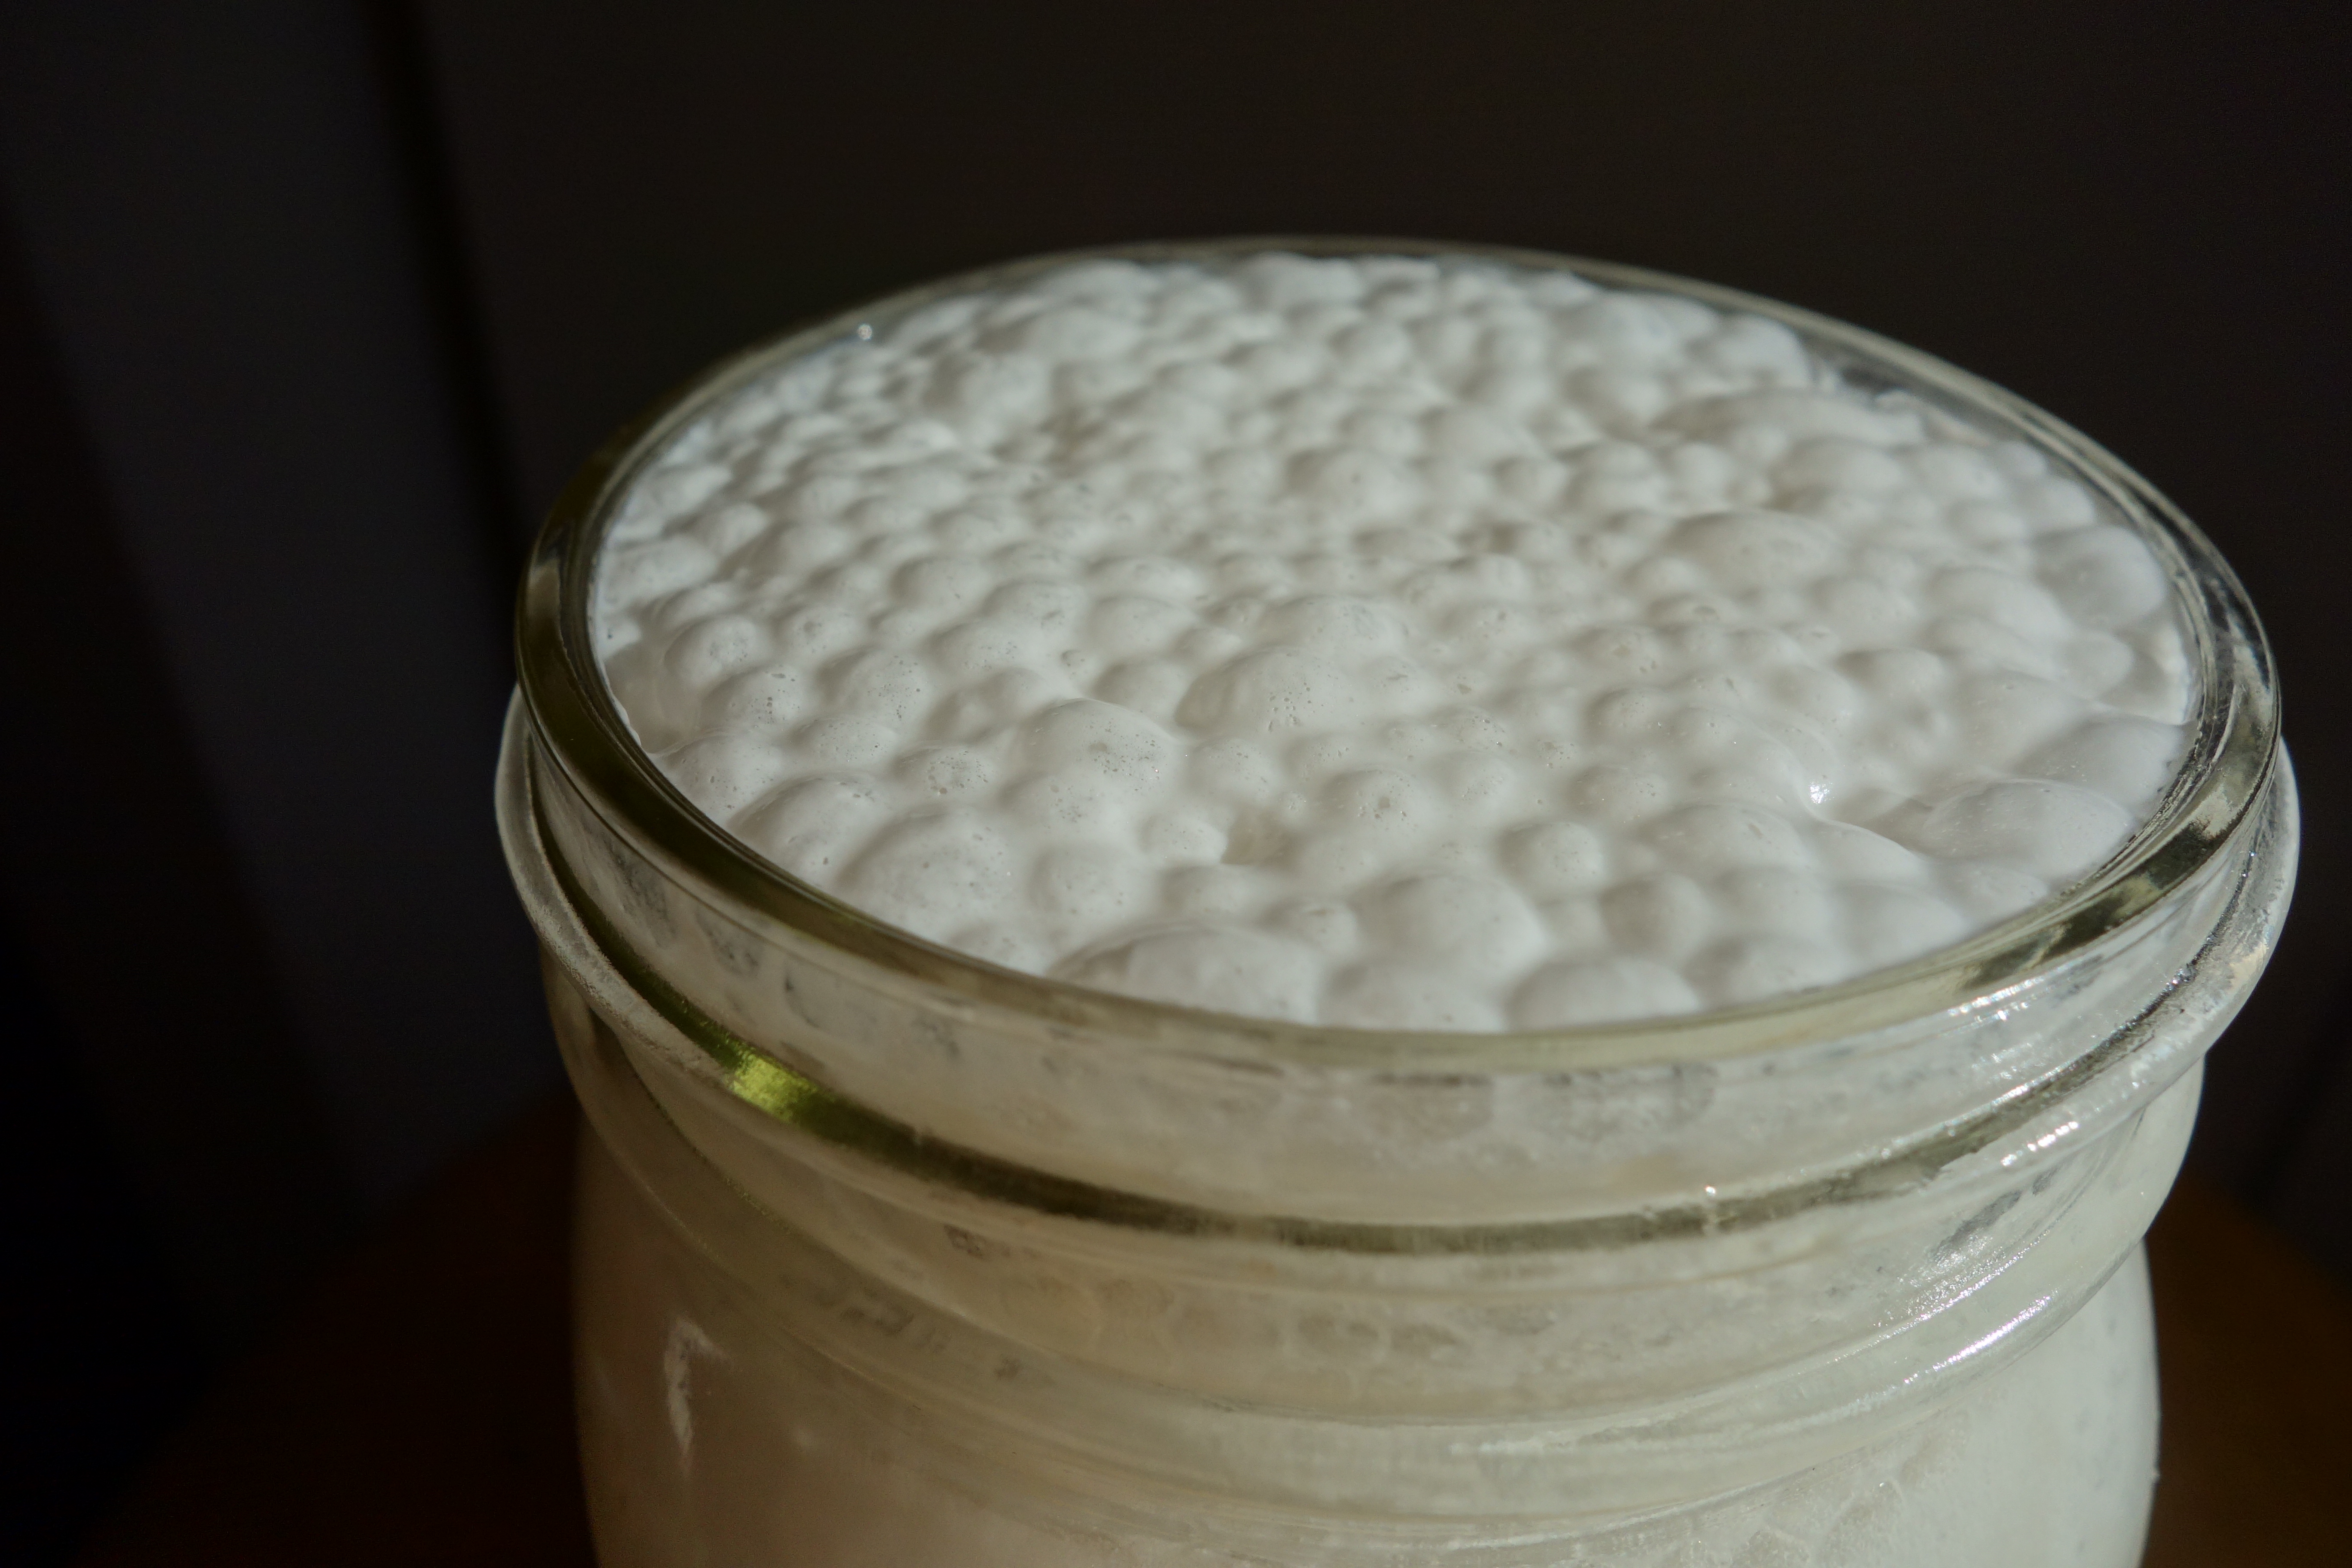
After the fermentation was done, I opened the lid and stirred the milk, which had separated. It bubbled up to the top of the jar and eventually settled back down. I put the lid back on and placed it in the fridge to thicken up. The next day I gave it a taste test and was pleased with the taste. The coconut milk that I used isn’t 100 percent creamy; it’s got small pieces of coconut in it, but we’re ok with that.
The yogurt got two thumbs up from Zevin. He asked for it to be less tangy next time, but that’s an easy fix. I think I’ll add vanilla to the rest of the batch, too, just to round out the flavors. His first bowl was drizzled with honey and happily gobbled up in minutes. Next Monday, yogurt is on the school’s snack calendar, and guess who’s going to be joining the the table? That’s right, a very happy boy.
Some notes before making this ridiculously easy, 2-ingredient yogurt.
- The only BPA-free can of organic coconut milk free of gums that I’ve found is Natural Value
. If you don’t mind gums but do want organic & BPA-free, try Native Forest
.
- Use whole fat coconut milk.
- Refrigerate the can overnight to allow the cream to thicken & the water to settle at the bottom. Keep the can upright & don’t shake it before opening. Scoop the thick stuff off the top, use the water for something else (a smoothie, perhaps).
- Use a capsule of high quality probiotics or inner-ēco dairy-free probiotic (it’s a liquid).
RECIPE
- 2 cans coconut milk, full fat
- 2 probiotic capsules or 2 T liquid probiotic
- Glass jar with lid, sterilized (running through the dishwasher is fine)
DIRECTIONS
- Scoop the thick coconut milk into the jar, add probiotic, stir, close lid.
- Let sit for 24 hours in an oven with the light on (don’t turn the oven on!). Your yogurt requires a somewhat constant 108 – 11o degrees to do its thing.
- Another option is to put a heating pad on low inside of a cooler, wrap the jar in a kitchen towel (something thin verses a thick bath towel) and set the jar in the cooler. Close the cooler & let sit for 8 – 24 hours.
- When yogurt reaches desired tang, place in refrigerator for at least 6 hours.
More with Mangos
The golden flood of spring mangos is still in full force and we’ve been taking advantage of this bounty. We’re eating lots of them fresh, saving most of the dried and pureed ones for later when fresh ones are no longer available.
Two nights ago I made a fresh mango salsa. Mango goes great with most meats, and since I’d already slow roasted a chicken earlier in the week, I wanted to use the leftovers.
 Salsa and chicken? Sounds like tacos! Since I can’t eat grains, Zevin’s allergic to corn and we steer clear of processed foods, we usually just skip taco shells and go the route of the lettuce wrap. Lettuce wraps work great for hand held food and I’m usually quite content with them. With tacos, though, I wanted something closer to a traditional taco shell. I wanted something more firm in my hand and little crunch for when my teeth first bite in.
A while back I came across a photo of jicama standing in for a taco shell. I don’t know who came up with the idea, but it was brilliant. Jicama is quite pliable when sliced uber thin, and it provides the bite and crunch reminiscent of a traditional taco shell. Jicama make the perfect spring taco shell because they’re light and even a bit juicy. Their slightly earthy flavor melds well with fresh spring veggies and fruit. Yes, including mango!
The salsa is quick to put together and the jicama takes only a few minutes to slice on the mandolin. You can cook some chicken from scratch, use leftovers or pick up a roasted bird from your local market to keep things fast and easy. A quick and easy meal bursting with flavor and crunch.
[bigoven-recipe url=”http://www.bigoven.com/recipe/498891/chicken-mango-tacos”]
Drink My Salad
I’m lazy. How lazy am I? I’m too lazy to chew.
Seriously, I enjoy a good salad: they taste great, they make me feel great, but OMG, they take so long to eat. Take a bite, chew, chew, chew. Take another bite, chew, chew, chew.
“Hey Jordan, we’re going out, wanna come?”
“Nope, sorry, I gotta stay home and masticate.”
Fortunately, I’ve found a solution: drink my salad. All the yumminess and healthy goodness of a salad, but you can slurp it down on the go!
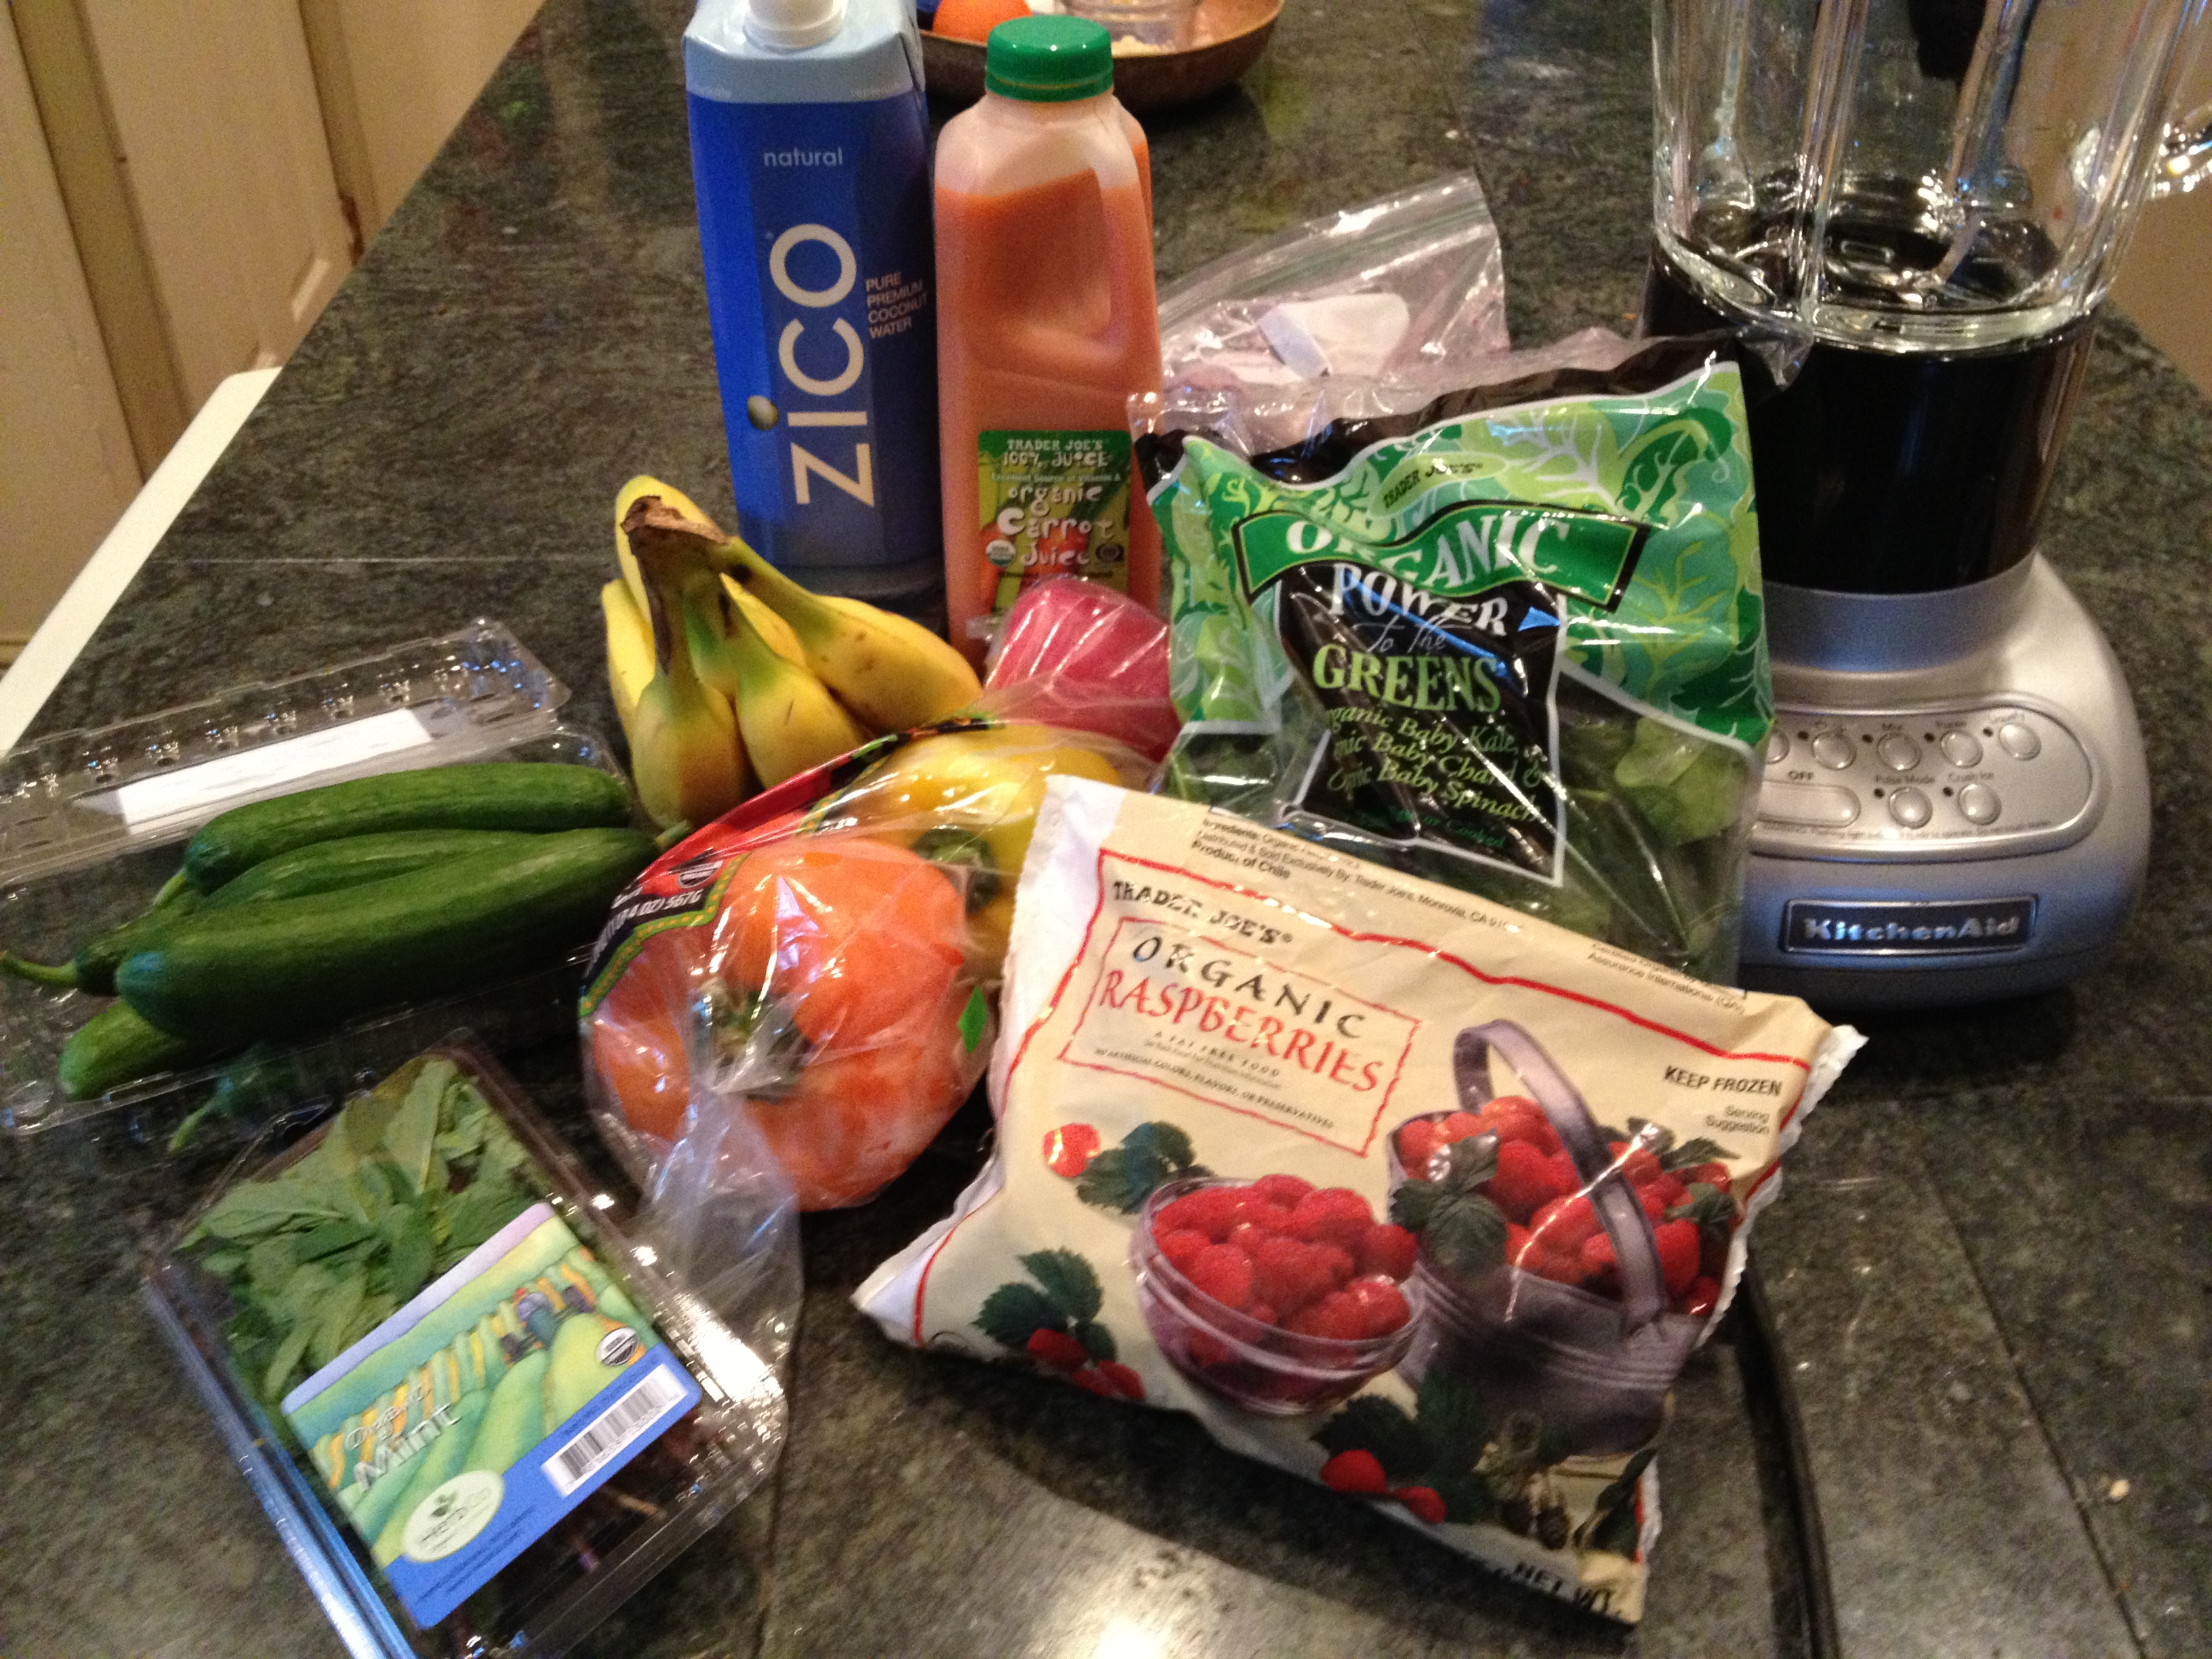
Here’s my recipe. As noted, you should think of this as a starting point. Personalize it. One bonus of the ingredients that I use is that virtually all of them can be found at Trader Joe’s, making for an easy shopping trip. I’ll make a big batch, freeze some of it, drink it over several days, then leave my frozen jar in the fridge to defrost for the next day.

[bigoven-recipe url=”http://www.bigoven.com/recipe/476423/salad-smoothie”]
Note: this is a salad in a blender, not be be confused with the sugar syrup they sell at places like Jamba Juice.
Roasted Vegetables
I love vegetables. Just about any way they can be served, I’m gonna be happy. But roasted veggies are especially nice, because the high heat brings out the flavors, especially in the sweeter ones.
 Plus, it’s easy! I roast mine at 425. The timing depends on the vegetable itself and the size of the pieces you’re roasting. Whole, medium sized beets need at least 45 minutes but something softer and smaller, like brussel sprouts, might be done in as little as 20 minutes. If you’re not sure how long your veggies will take, set your timer for 15 minutes. When time’s up, poke with a fork. Too hard? Keep cooking. Reset for 10 minutes & then poke again. Keep setting your timer so that you remember to check.
After you’ve done this a time or two you’ll get a feel for how long different veggies take and how the size of your pieces affects cooking time. If you’re going to make a mix of veggies in one baking dish, cut denser veggies smaller & leave softer ones a little bigger. This way they’ll be done at the same time.
Beets can be peeled & cut to cook with other vegetables, but red ones might bleed out onto lighter colored veggies. If you plan to cook beets by themselves you can actually roast them with their skins on, which makes peeling so much easier than raw. I rinse my beets, place them in a glass baking dish with a little puddle of water in the bottom & drizzle a tiny bit of olive oil over them. I tightly cover the dish with foil. A tight seal on most roasting vegetables isn’t essential, but for beets it is. You want to create enough steam to cook this dense vegetable, and the steam also helps the skin separate. Wait at least 40 minutes (don’t peek before 40!) to test your beets for doneness. If you’re worried about them burning on the bottoms just give the pan a little shake to roll the beets a bit. To test, poke with a fork. I like mine to allow a fork to easily penetrate, but not be too soft.
When the beets are done, take them out of the oven, and if time allows, secure the foil over the tight and let them cool. This makes the skins super easy to remove. If you don’t have time for this, no problem, cool with the foil off.
To remove the skins, use a kitchen towel. Sometimes the beets stain, so you may want to use an old one. Place the beet in the center of the towel, pick it up and rub the skin off. It should fall away pretty easily. I’ve found red beets to give up the skins more easily than the gold.
I use a glass baking dish and fill the bottom with a single layer of cut vegetables, generously drizzling olive oil & a sprinkle of coarse sea salt before covering with foil. Then I place in the oven, set the timer & do a little clean up while waiting for them to be done.